You’ve got a recycling bin bursting at the seams and a creative itch that won’t quit. Perfect. Let’s turn would-be trash into handmade treasures that make your space look cool and your wallet breathe a sigh of relief.
No fancy tools, no art degree—just a little curiosity and a sense of humor. Ready to make something awesome without spending a dime?
Why Recycled Art Just Hits Different
You save money, you save stuff from the landfill, and you get one-of-a-kind pieces no one else owns. That’s a win-win-win, FYI.
Plus, working with “found” materials forces creativity in a way store-bought supplies never do. You’ll see potential everywhere—your cereal box is now canvas royalty.
Also, when you mess up (and you will), it hurts less. You used a bottle cap, not a $20 canvas.
So take risks, make weird choices, and have fun.
Tools You Actually Need (And Nothing You Don’t)
- Adhesives: White glue, hot glue gun (optional but clutch), and tape.
- Cutting tools: Scissors, craft knife, old cutting board.
- Finishing touches: Acrylic paint, markers, Mod Podge (or watered-down glue), and brushes.
- Cleanup/helper items: Clips, rubber bands, clothespins, and newspaper to protect surfaces.
Keep it simple. If your toolkit fits in a shoebox, you’re good. IMO, the best “tool” is patience—glue dries when it wants to.

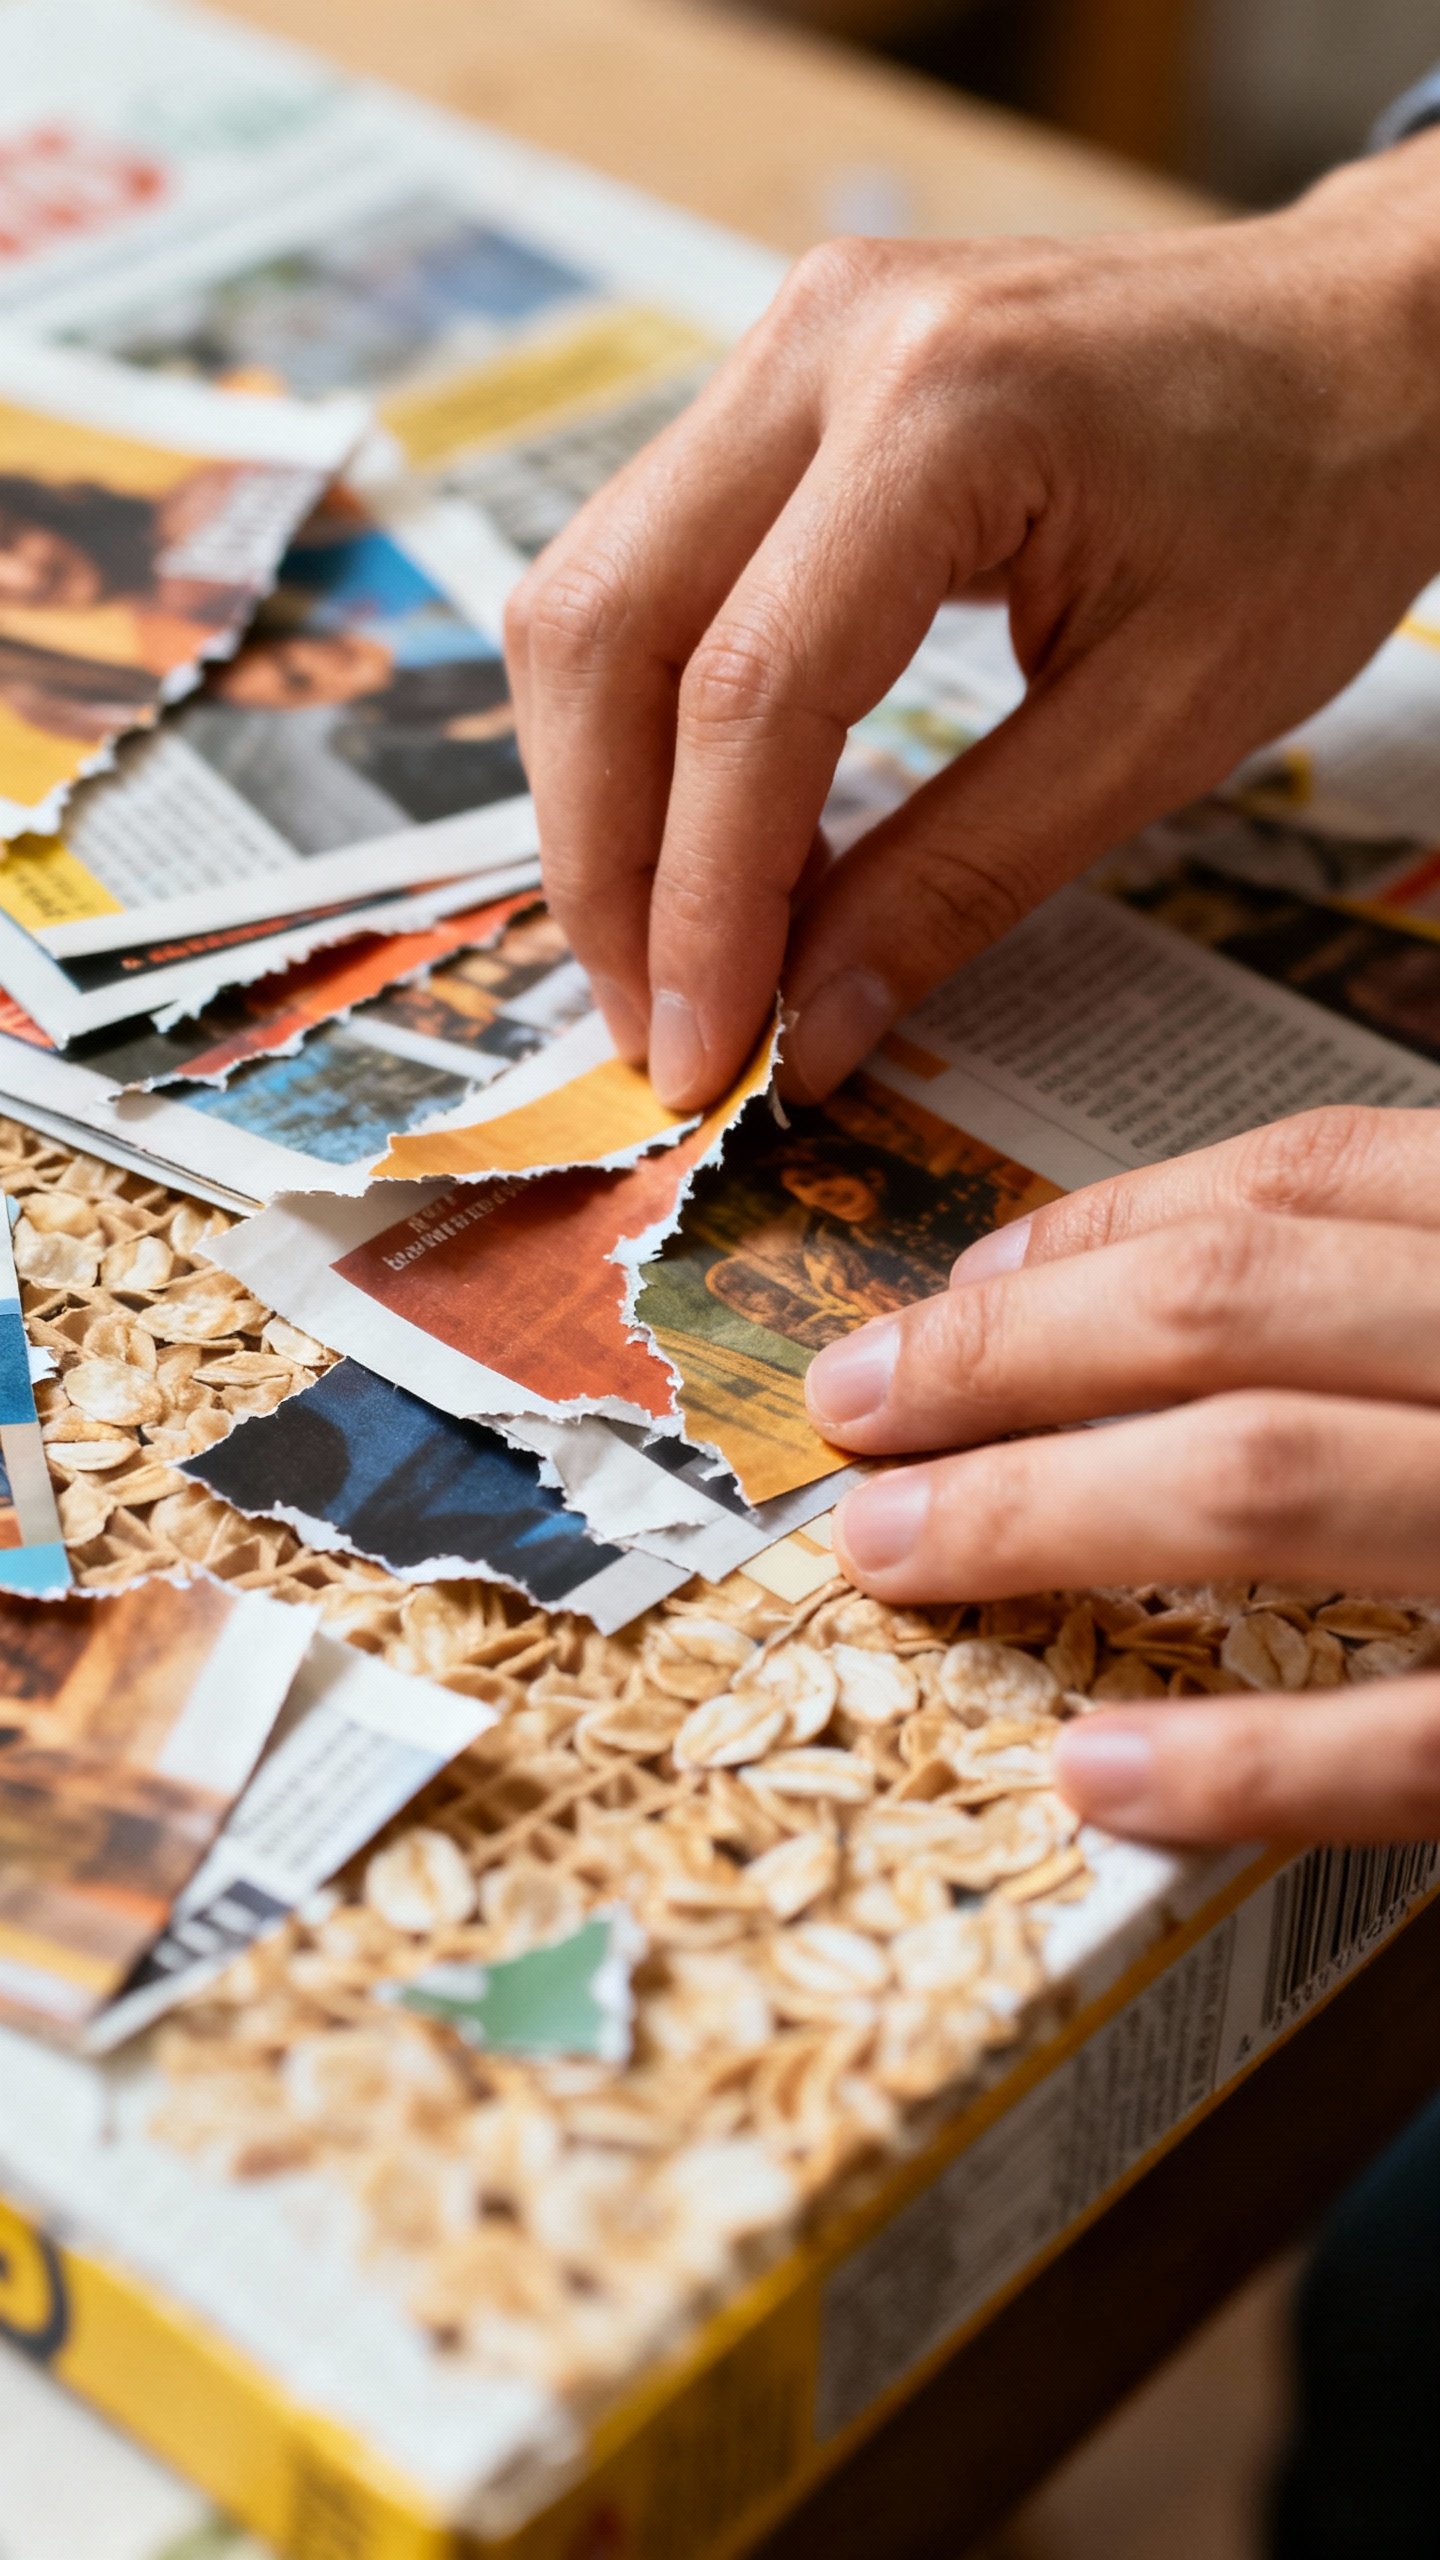
Project 1: Magazine Collage Wall Art That Looks Boutique
Got a stack of old magazines or catalogs?
Boom. You’ve got color, texture, and typography for days. Cut or tear pieces and layer them on a sturdy backing like a cereal box, old frame insert, or pizza box lid (clean it first, obviously).
How to make it pop
- Pick a color palette—two main colors and one accent.
Keep it cohesive.
- Cut shapes: circles, strips, and organic blobs. Mix sizes.
- Glue from background to foreground. Overlap edges for depth.
- Finish with a bold element: a silhouette, a word, or a hand-drawn doodle in marker.
Pro tip: Seal with a thin layer of Mod Podge to unify textures and add a subtle sheen.
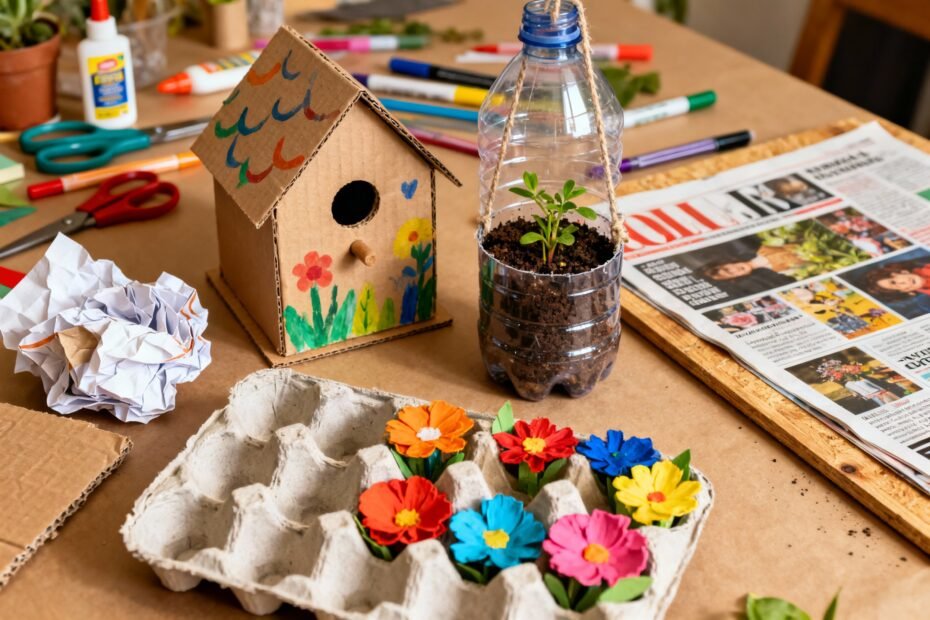
Project 2: Tin Can Planters (And Pencil Holders) That Don’t Look Like Trash
Wash out a can, remove the label, and sand the rim if needed.
From there, your options explode. You can paint, wrap with twine, or collage with paper scraps.
Quick styling ideas
- Minimalist: Spray paint in matte black or white; add a hand-painted stripe.
- Boho: Wrap with jute and glue every few inches; finish with a tassel.
- Graphic: Glue on magazine letters for ransom-note chic.
Planting FYI: Punch a few drainage holes in the bottom if using as a planter. Add pebbles before soil to keep roots happy.
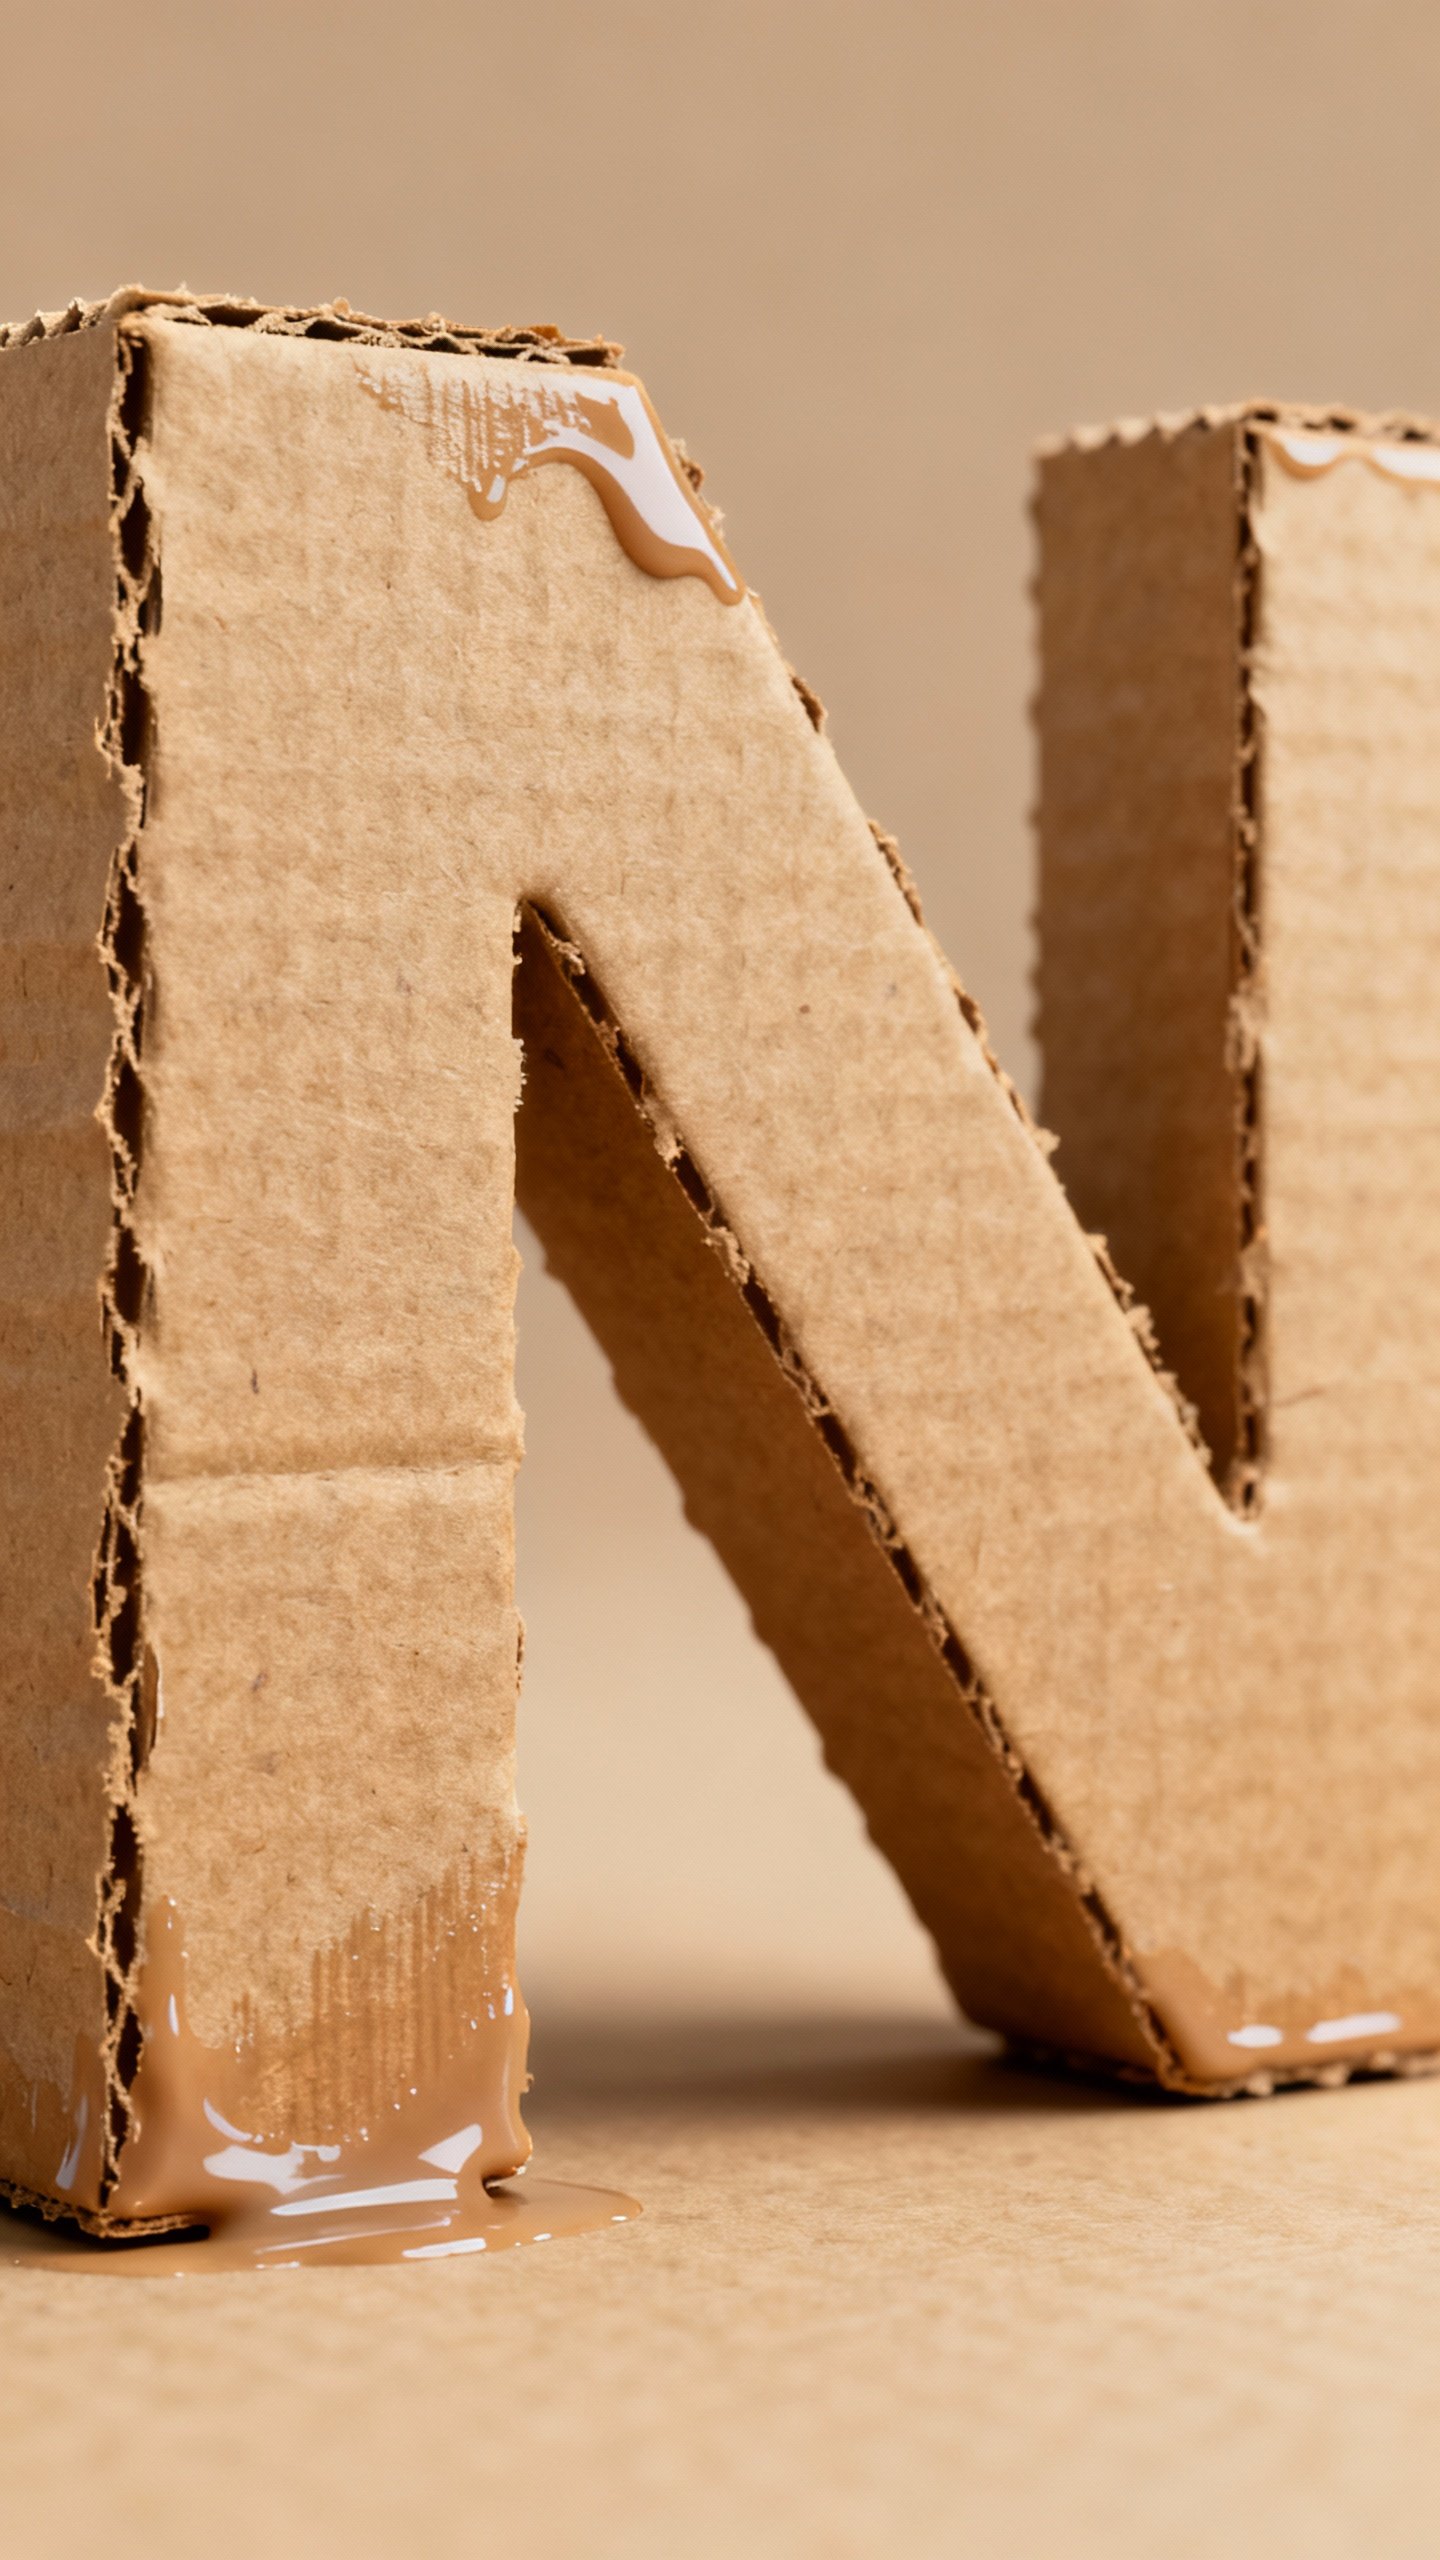
Project 3: Cardboard Sculptures That Defy Expectations
Cardboard isn’t just for shipping regrets.
You can stack, slot, and layer it into bold sculptures or decor. Think geometric animals, abstract forms, or tabletop letters.
Build basics
- Sketch your shape. Break it into layers or interlocking pieces.
- Cut pieces carefully and dry-fit before gluing.
- Use scraps as internal supports—like ribs in a model plane.
- Paint in solid colors or cover with paper for a clean finish.
Shortcut: Print a simple template (letters, shapes), trace onto cardboard, and stack 4–6 layers for chunky 3D letters.
Seal edges with watered glue for a smoother paint job.
Project 4: Bottle Art—From Drab to “Wait, You Made That?”
Glass or plastic bottles make killer vases, candle holders, or mood lighting. Clean them, remove labels with warm soapy water, and you’ve got a blank canvas.
Ideas to try
- Gradient paint: Sponge two colors that blend at the middle.
- Twine wrap: Spiral twine from base to neck, glue occasionally, add a charm or bead.
- Fairy lights: For glass bottles, feed a battery light string inside. Instant atmosphere.
- Pressed-flower decoupage: Glue pressed leaves or petals and seal with Mod Podge.
Want a label-free look without scraping for hours? Use oil (olive, coconut) on sticky residue, wait 10 minutes, then wipe.
Works like magic.
Project 5: Fabric Scrap Banners and Coasters
Old shirts, ripped jeans, orphan socks—fabric scraps deserve a victory lap. Turn them into party banners, coasters, or even mini wall hangings.
No-sew banner
- Cut triangles or pennants from fabric scraps or old tote bags.
- Fold the top edge over string or twine and glue.
- Add stenciled letters or shapes if you feel fancy.
Upcycled coasters
- Cut circles from thick felt or denim layers.
- Glue 2–3 layers for thickness; finish edges with fabric glue or a whip stitch if you sew.
- Optional: Add a cork backing from an old placemat for extra grip.
Hot drink tip: Seal fabric coasters with a thin layer of Mod Podge Outdoor for water resistance.
Project 6: Egg Carton Florals (Because Why Not?)
Paper egg cartons hide serious potential. Cut each cup, snip petal shapes, and layer them into flowers with a dab of glue in the center.
Paint them bright or stick to soft pastels.
Ways to use them
- Glue to a canvas for a textured floral artwork.
- Attach to a wreath base (cardboard ring works) for seasonal decor.
- String onto fairy lights for a whimsical look.
Center flair: Use a bead, button, or rolled paper coil for a tidy flower center. Tiny details make it look pro.
Finishing Moves: Make It Look Store-Bought
- Edge clean-up: Sand cardboard edges; trim glue strings from hot glue.
- Color cohesion: Use a limited palette across pieces. Repetition = design magic.
- Sealers: Mod Podge for paper, clear spray acrylic for paint, beeswax polish for wood.
- Hanging hardware: For lightweight art, use command strips or glued soda tabs as hangers.
Small upgrades turn “craft project” into “art.” IMO, a clean finish matters more than a complicated idea.
Sourcing Smart: Treasure Hunt at Home
- Kitchen: Jars, cans, boxes, paper bags, bottle caps, utensils for texture tools.
- Closet: Old jeans (denim = gold), belts (for handles), scarves (fabric strips).
- Office: Magazines, mailers, cardboard mailers, paperclips.
- Outdoors: Sticks, leaves, stones—clean and dry them first.
Set up a small “materials bin.” Once you start collecting, ideas snowball.
You’ll never look at a yogurt cup the same way again—sorry, not sorry.
Safety Notes So You Keep All Your Fingers
- Ventilate when painting or sealing. Open a window, light fans. Your brain cells will thank you.
- Cut away from your body and use a cutting mat.
Cardboard fights back.
- Keep hot glue off skin. If it happens, dunk in cool water immediately.
- For kids, swap hot glue with white glue and skip sharp tools.
FAQ
Q: How do I stop paper projects from warping when I use glue?
Use thin, even layers of glue and press under books while drying. You can also seal both sides with Mod Podge to balance moisture.
For bigger pieces, mount paper on cardboard first.
Q: What paint works best on recycled materials?
Acrylic paint handles almost anything: cardboard, plastic (scuff first), and metal. For glass, use multi-surface or enamel acrylics. Let it cure 24–72 hours for durability.
Q: My hot glue won’t stick to glass or metal—help?
Clean surfaces with rubbing alcohol, then rough them up with sandpaper.
Use a stronger adhesive like E6000 or a gel super glue for slick materials. Hot glue works better as a temporary clamp than a final bond here.
Q: How do I make recycled art look intentional, not random?
Limit your color palette, repeat shapes, and keep consistent textures. Build around a theme—botanical, geometric, or monochrome.
A little planning goes a long way, FYI.
Q: Can I sell art made from recycled materials?
Absolutely. People love sustainable, handmade pieces. Just ensure clean finishes, sturdy construction, and simple, cohesive designs.
Packaging with your “materials story” helps it stand out.
Conclusion
Recycled art lets you experiment without pressure, make useful decor, and flex your creativity with materials you already own. Start small, keep it playful, and iterate—your best ideas arrive mid-glue mess. Grab that cereal box, queue a playlist, and make something awesome today.
IMO, you’ll never look at “trash” the same way again.
Explore More on FreeKidsHub
Jump into your favorite category for easy printables, fun activities, and family-friendly ideas — all in one place.
Tip: Add this block to the end of every post for stronger internal links ✨