Holidays roll through the year like a crafting conveyor belt, and kids don’t need much encouragement to hop on. Give them some glue, paper, and a funny-shaped potato, and boom—magic. This guide packs easy, fun DIY holiday crafts for all seasons using stuff you probably already own.
No art degree required, and FYI, you won’t need a vacuum for hours afterward.
Why Crafting With Kids Wins (Every Season)
Crafting gives kids a low-pressure way to express themselves while practicing fine motor skills and patience. You also get built-in screen-free time—which, IMO, counts as a holiday miracle. Plus, these projects double as decor and gifts, which means fewer last-minute shopping trips and more cocoa time.
Before you start, create a simple craft station: a bin with glue sticks, washable paint, markers, safety scissors, tape, twine, colored paper, and recyclables.
Add a small tray for glitter containment. Your future self will thank you.
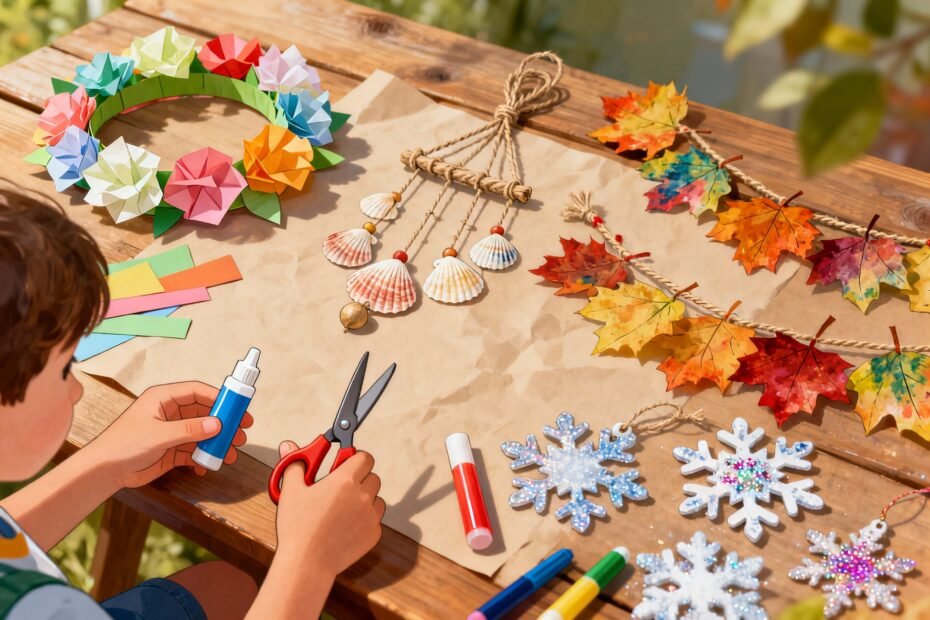
Winter Warm-Ups: Cozy Crafts for Cold Days
Winter crafts can feel magical without the complicated Pinterest energy. Think sparkly, simple, and snuggly.
Kids love sensory elements like texture and shine, so lean in.
Snowflake Stained “Glass” (Paper + Tissue)
- Cut a snowflake frame from black construction paper (a thick border helps).
- Stick tissue paper squares to clear contact paper, then sandwich the snowflake frame on top.
- Trim the edges and hang on a window. Boom—instant winter wonderland.
Pro tip: No contact paper? Use glue sticks on wax paper and let it dry.
Sock Snow People
- Fill a white sock with rice or beans.
Tie off sections with string to form a body and head.
- Add a ribbon scarf, button eyes, and a paper nose.
- Use the sock cuff as a beanie. Is it adorable? Yes.
Will it shed rice? Only if someone juggle-tests it.
Cardboard Gingerbread Village
- Cut house shapes from cardboard. Paint with brown tempera for a gingerbread look.
- Draw “icing” with white paint pens and add candy details with stickers or paper dots.
- Stand them up with folded cardboard feet for a reusable display.
Spring Vibes: Bright, Bloomy, and Easy to Clean
Spring crafts should feel fresh and colorful.
You can even sneak in nature walks for supplies. Budget-friendly? Absolutely.
Pressed Flower Bookmarks
- Pick small flowers or leaves and press them inside heavy books for a few days.
- Arrange them on a strip of cardstock and seal with clear packing tape or contact paper.
- Punch a hole and tie a ribbon.
Instant gift for grandparents who still love paper.
Egg Carton Critters
- Cut egg carton cups and paint them bright colors.
- Add pipe cleaner antennae, googly eyes, and paper wings.
- Turn them into caterpillars, ladybugs, or mystery bugs with fancy names.
Watercolor Coffee Filter Flowers
- Let kids paint coffee filters with watercolors or diluted food coloring.
- Scrunch and twist them onto pipe cleaners for stems.
- Group a few into a bouquet. No watering required.
Summer Fun: Low-Mess Crafts You Can Take Outside
Summer crafts should hold up to heat and popsicle drips. Take them outside, keep them simple, and let kids get a little wild.
Nature Wands
- Collect sticks, leaves, and flowers from the yard or park.
- Wrap the stick with yarn or twine and tuck in findings.
- Add a paper star or ribbon streamers.
Certified backyard magic.
DIY Kites (Paper + Straws)
- Cut a diamond from lightweight paper (like kraft or drawing paper).
- Tape two straws in a cross for support, add string to the frame, and tape tissue strips as tails.
- Decorate, then test on a breezy day. Not hurricane force, please.
Painted Rock Buddies
- Find smooth rocks. Wash and dry them.
- Paint animals, emojis, or picnic friends.
Seal with Mod Podge if you want longevity.
- Hide them along a walking path to spark joy for strangers.
Fall Feels: Rustic, Textured, and Totally Giftable
Fall crafts deliver cozy vibes in five minutes or less. You’ll use oranges, leaves, and all the warm colors. Yes, pumpkin spice counts as a color.
Leaf Rubbings With a Twist
- Place leaves under paper and rub with crayons to reveal veins.
- Outline with black marker and paint over with watercolors for a stained-glass effect.
- Cut into bunting triangles and hang on twine.
Citrus Slice Ornaments
- Slice oranges thin, pat dry, and bake at low heat (200°F/93°C) for 2–3 hours, flipping once.
- Let kids thread twine through the top and add cinnamon sticks or beads.
- Hang in windows or on a mantel.
They smell like holidays without the candle guilt.
Paper Plate Pumpkins
- Paint a paper plate orange. Add a green paper stem and leaf.
- Let kids draw silly faces or glue on shapes.
- String several together for easy garland.
Holiday-Specific Hits (Quick Wins You’ll Reuse)
Sometimes you want crafts that just scream a specific holiday. These pop off the table and onto your walls fast.
Valentine’s Day: Collage Cards
- Cut heart shapes from scrap paper, magazines, and old art.
- Layer onto folded cardstock and add a handwritten note.
- Pro tip: Keep a “cutting scraps” bin for year-round card-making.
Halloween: Paper Bag Puppets
- Use lunch bags as bases.
Add fangs, eyes, and capes from colored paper.
- Let kids create a monster puppet show. Admission: one candy.
Thanksgiving: Gratitude Tree
- Arrange twigs in a jar with pebbles.
- Cut paper leaves and punch holes. Each day, write one thing you’re grateful for.
- Hang leaves on branches and watch the tree “fill.” Heartwarming and decor-worthy.
Winter Holidays: Salt Dough Keepsakes
- Mix 2 cups flour, 1 cup salt, 1 cup water.
Knead and roll.
- Cut shapes, poke a straw hole, and bake at 250°F/120°C for 2–3 hours.
- Paint, seal, and hang. Handprint ornaments = instant nostalgia.
Smart Setup: Keep It Fun, Not Chaotic
You want joy, not disaster. A few simple systems keep everyone happy.
- Contain supplies: Use trays or baking sheets for each kid.
- Pre-cut when possible: Younger kids do great when you prep shapes.
- Use washable everything: Markers, paint, tablecloths—the works.
- Offer limited choices: Two paint colors, three stickers.
Less overwhelm, more creativity.
- Display proudly: A rotating gallery string with clothespins makes kids feel like pros.
Easy Clean-Up Routine
- Five-minute “sweep” with sticky lint rollers for glitter and tiny bits.
- Wipe surfaces with a damp cloth + a drop of dish soap.
- Rinse brushes right away and store them bristle-up in a jar.
Crafting With Different Ages
Mixed ages? No problem. You can scale almost any project.
- Toddlers: Big shapes, chunky stickers, hand-over-hand gluing.
- Preschoolers: Simple cutting, stamping, and pattern play.
- Elementary: More steps, real measuring, and design choices.
- Tweens: Let them lead.
Offer add-ons like embroidery floss or paint pens.
FYI, kids don’t need perfection. They need ownership. If the snowman has eight eyes, we roll with it.
FAQs
Q: How do I keep crafts budget-friendly?
Start with recyclables and basics: cardboard, paper, tape, glue sticks, and markers.
Save jars, egg cartons, and gift wrap scraps. Thrift stores often have cheap craft gold—ribbon, buttons, yarn—for pennies.
Q: My kid hates messes. Any low-mess options?
Try sticker collages, washi tape art, dot markers, and contact paper “stained glass.” Use pre-cut shapes and peel-and-stick gems.
A silicone mat keeps mess anxiety low.
Q: What if I don’t have fancy supplies?
Most projects here use household items. Swap paint for crayons, yarn for string, and glitter for metallic markers. IMO, constraints make kids more creative.
Q: How do I store finished crafts without drowning in paper?
Photograph art and create a yearly photo book.
Keep a small “best of” box for 3D favorites. Rotate displays monthly so you celebrate without hoarding.
Q: How can I make crafts last longer?
Seal paper crafts with clear contact paper, Mod Podge, or packing tape. Use heavy cardstock and reinforce holes with tape before punching.
Store flat in large envelopes.
Conclusion
DIY holiday crafts for kids don’t need to be complicated or expensive to feel special. Set out a few supplies, pick a season, and let their imaginations run wild. You’ll end up with decor, gifts, and memories—plus maybe a glitter trail, which, IMO, just means you nailed it.
Explore More on FreeKidsHub
Jump into your favorite category for easy printables, fun activities, and family-friendly ideas — all in one place.
Tip: Add this block to the end of every post for stronger internal links ✨