
You know that moment when you’re late for school drop-off, someone can’t find their backpack, and somehow the permission slip vanished into another dimension? Let’s fix that. A family command center for kids turns chaos into “we’ve got this” energy.
It doesn’t need to be Pinterest-perfect (unless you want it to be). It just needs to work—and this DIY guide will help you build one that does.
Pick the Perfect Spot
You don’t need a whole wall or a fancy mudroom. You need a high-traffic spot kids actually pass by every day.
The command center has to live where your family lives.
- Best locations: Kitchen, entryway, hallway near the bedrooms, or the garage door area.
- Kid height matters: Place hooks, bins, and charts so kids can use them without help.
- Visibility over aesthetics: If you tuck it away, everyone will forget it exists—ask me how I know.
Wall vs. Fridge vs. Cabinet
– Wall: Most flexible, looks great, easy to scale. – Fridge: Fast to set up with magnets but can get cluttered. – Inside a cabinet door: Minimalist vibes, but out of sight can mean out of mind.
IMO, choose a spot you walk past 20 times a day.
What Your Command Center Needs (aka The Core Four)
The best systems keep it simple. You don’t need 37 organizers. Stick with these four elements and add from there.
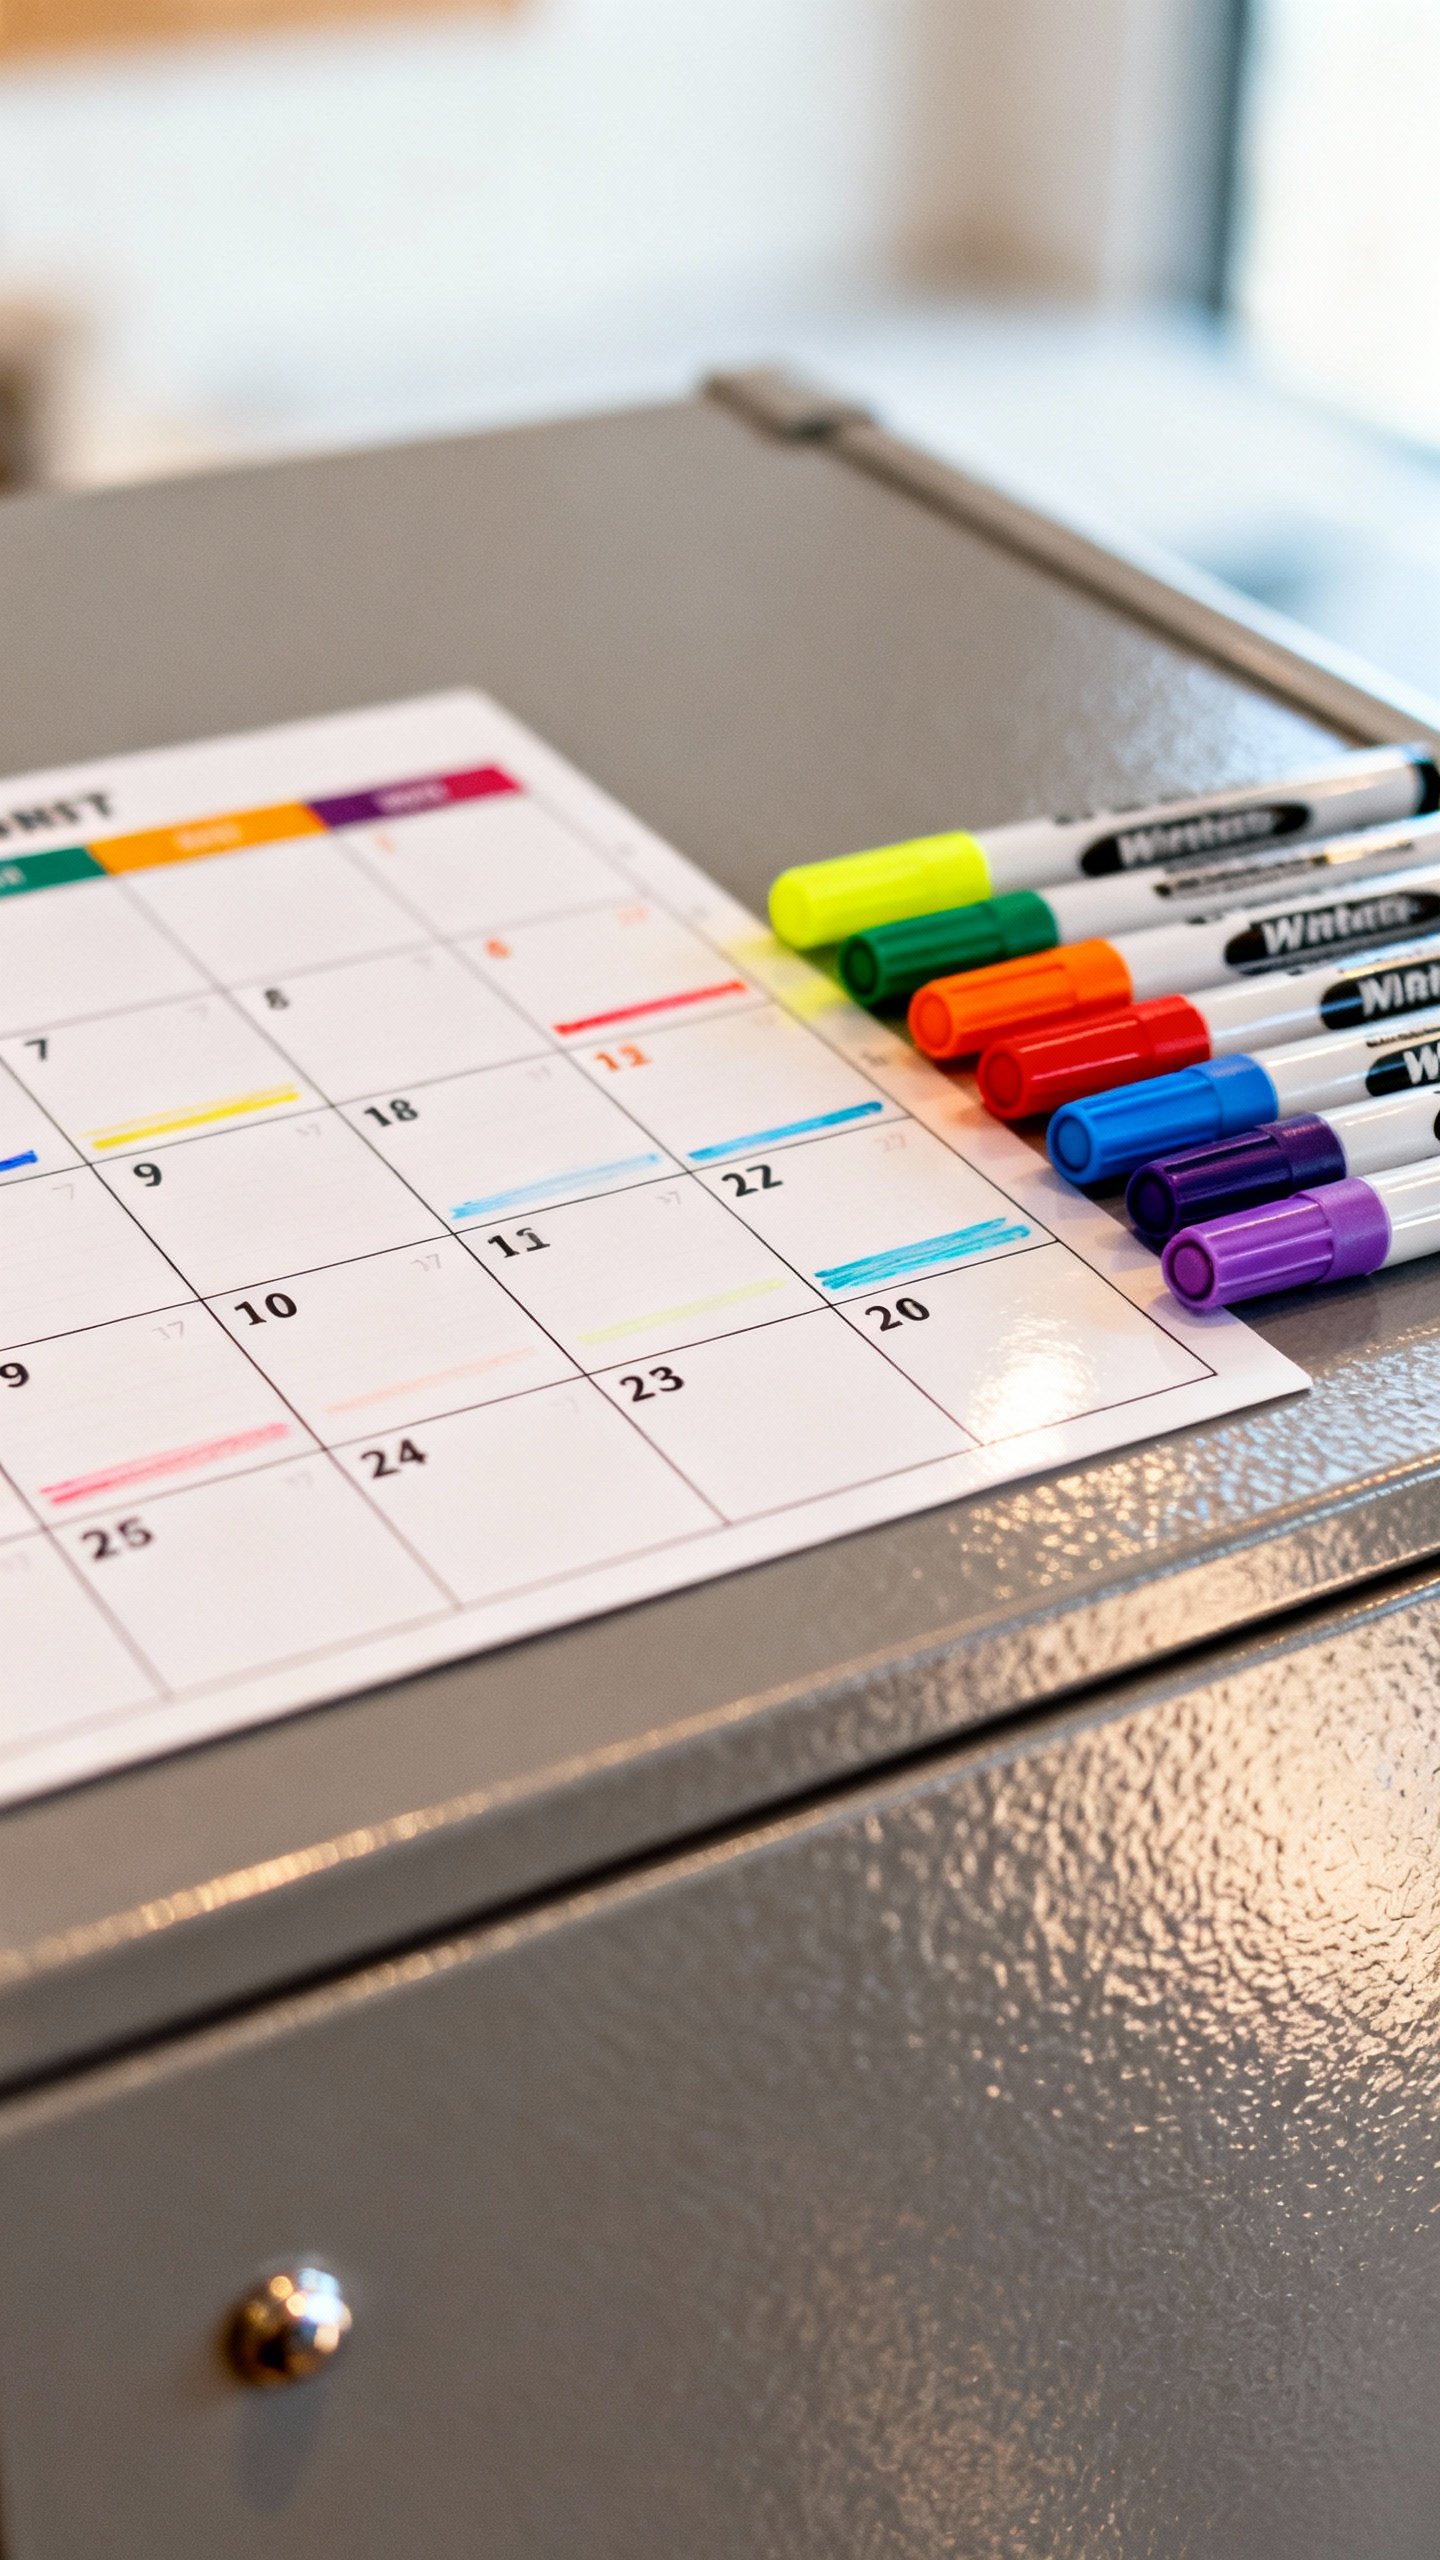
- Calendar: Family schedule at a glance.
Use color-coding for each kid.
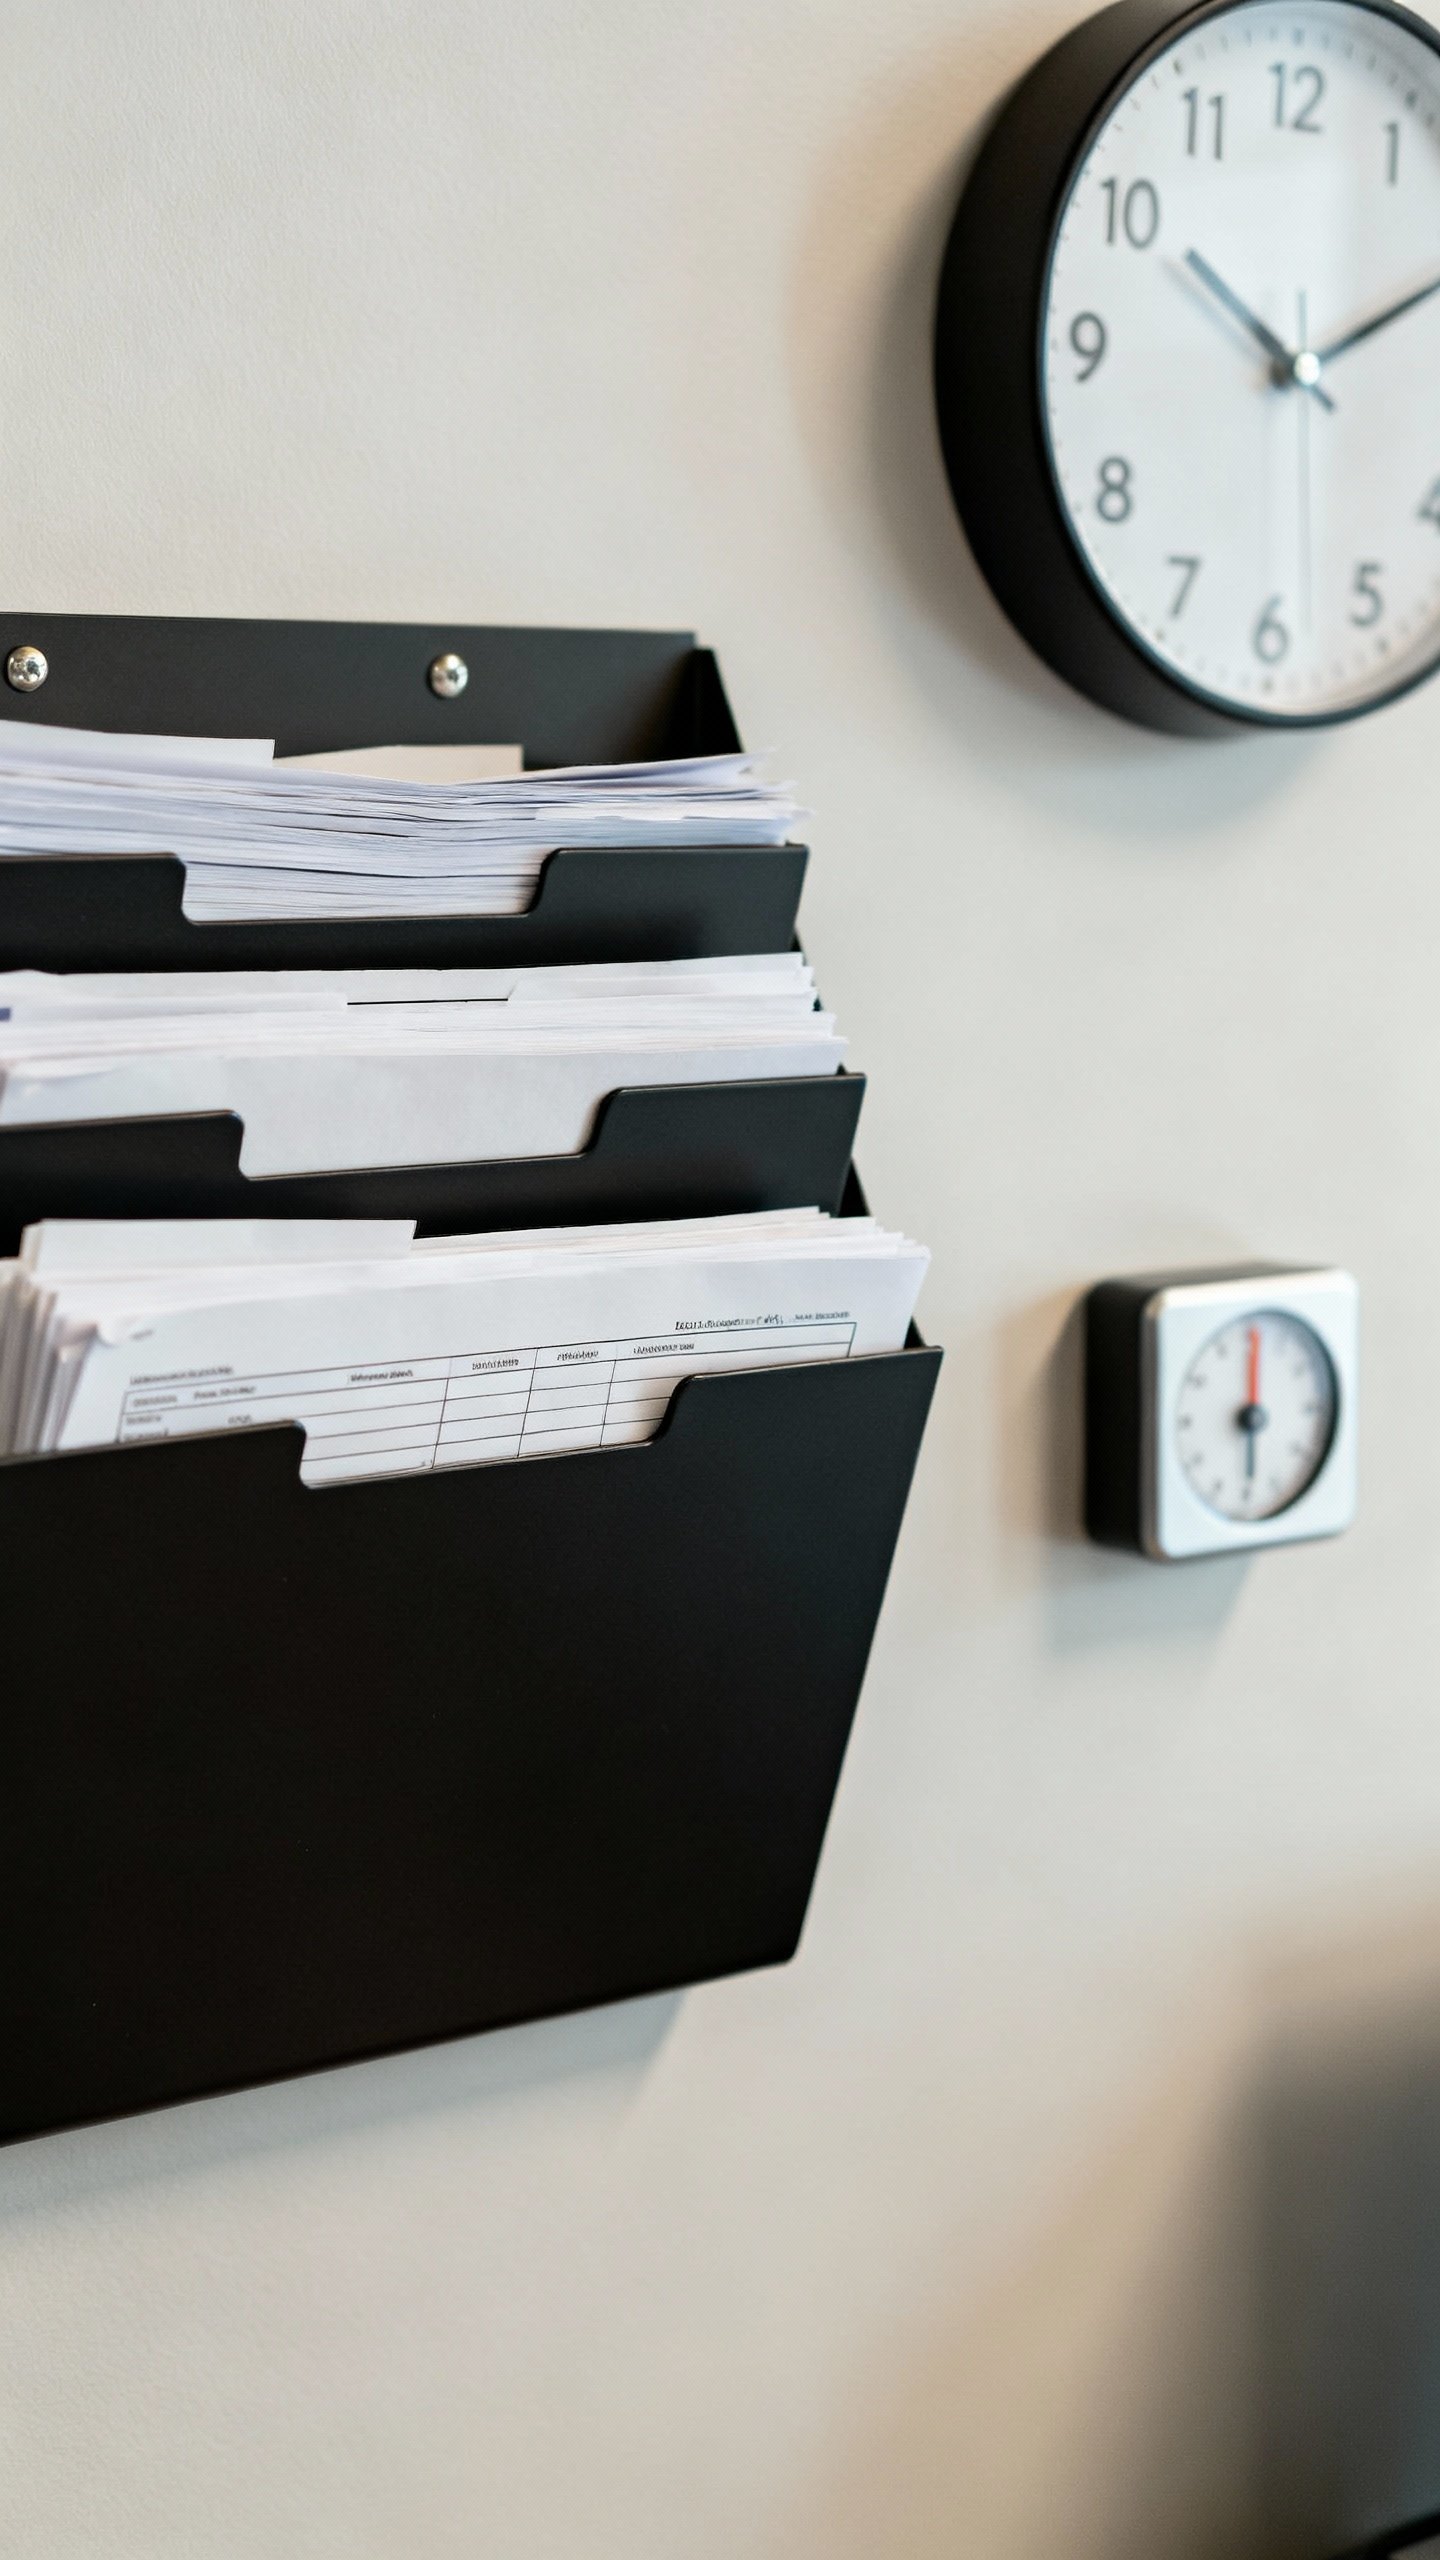
- Inbox/Outbox: A place for forms and things that need signing, plus a spot to return them.
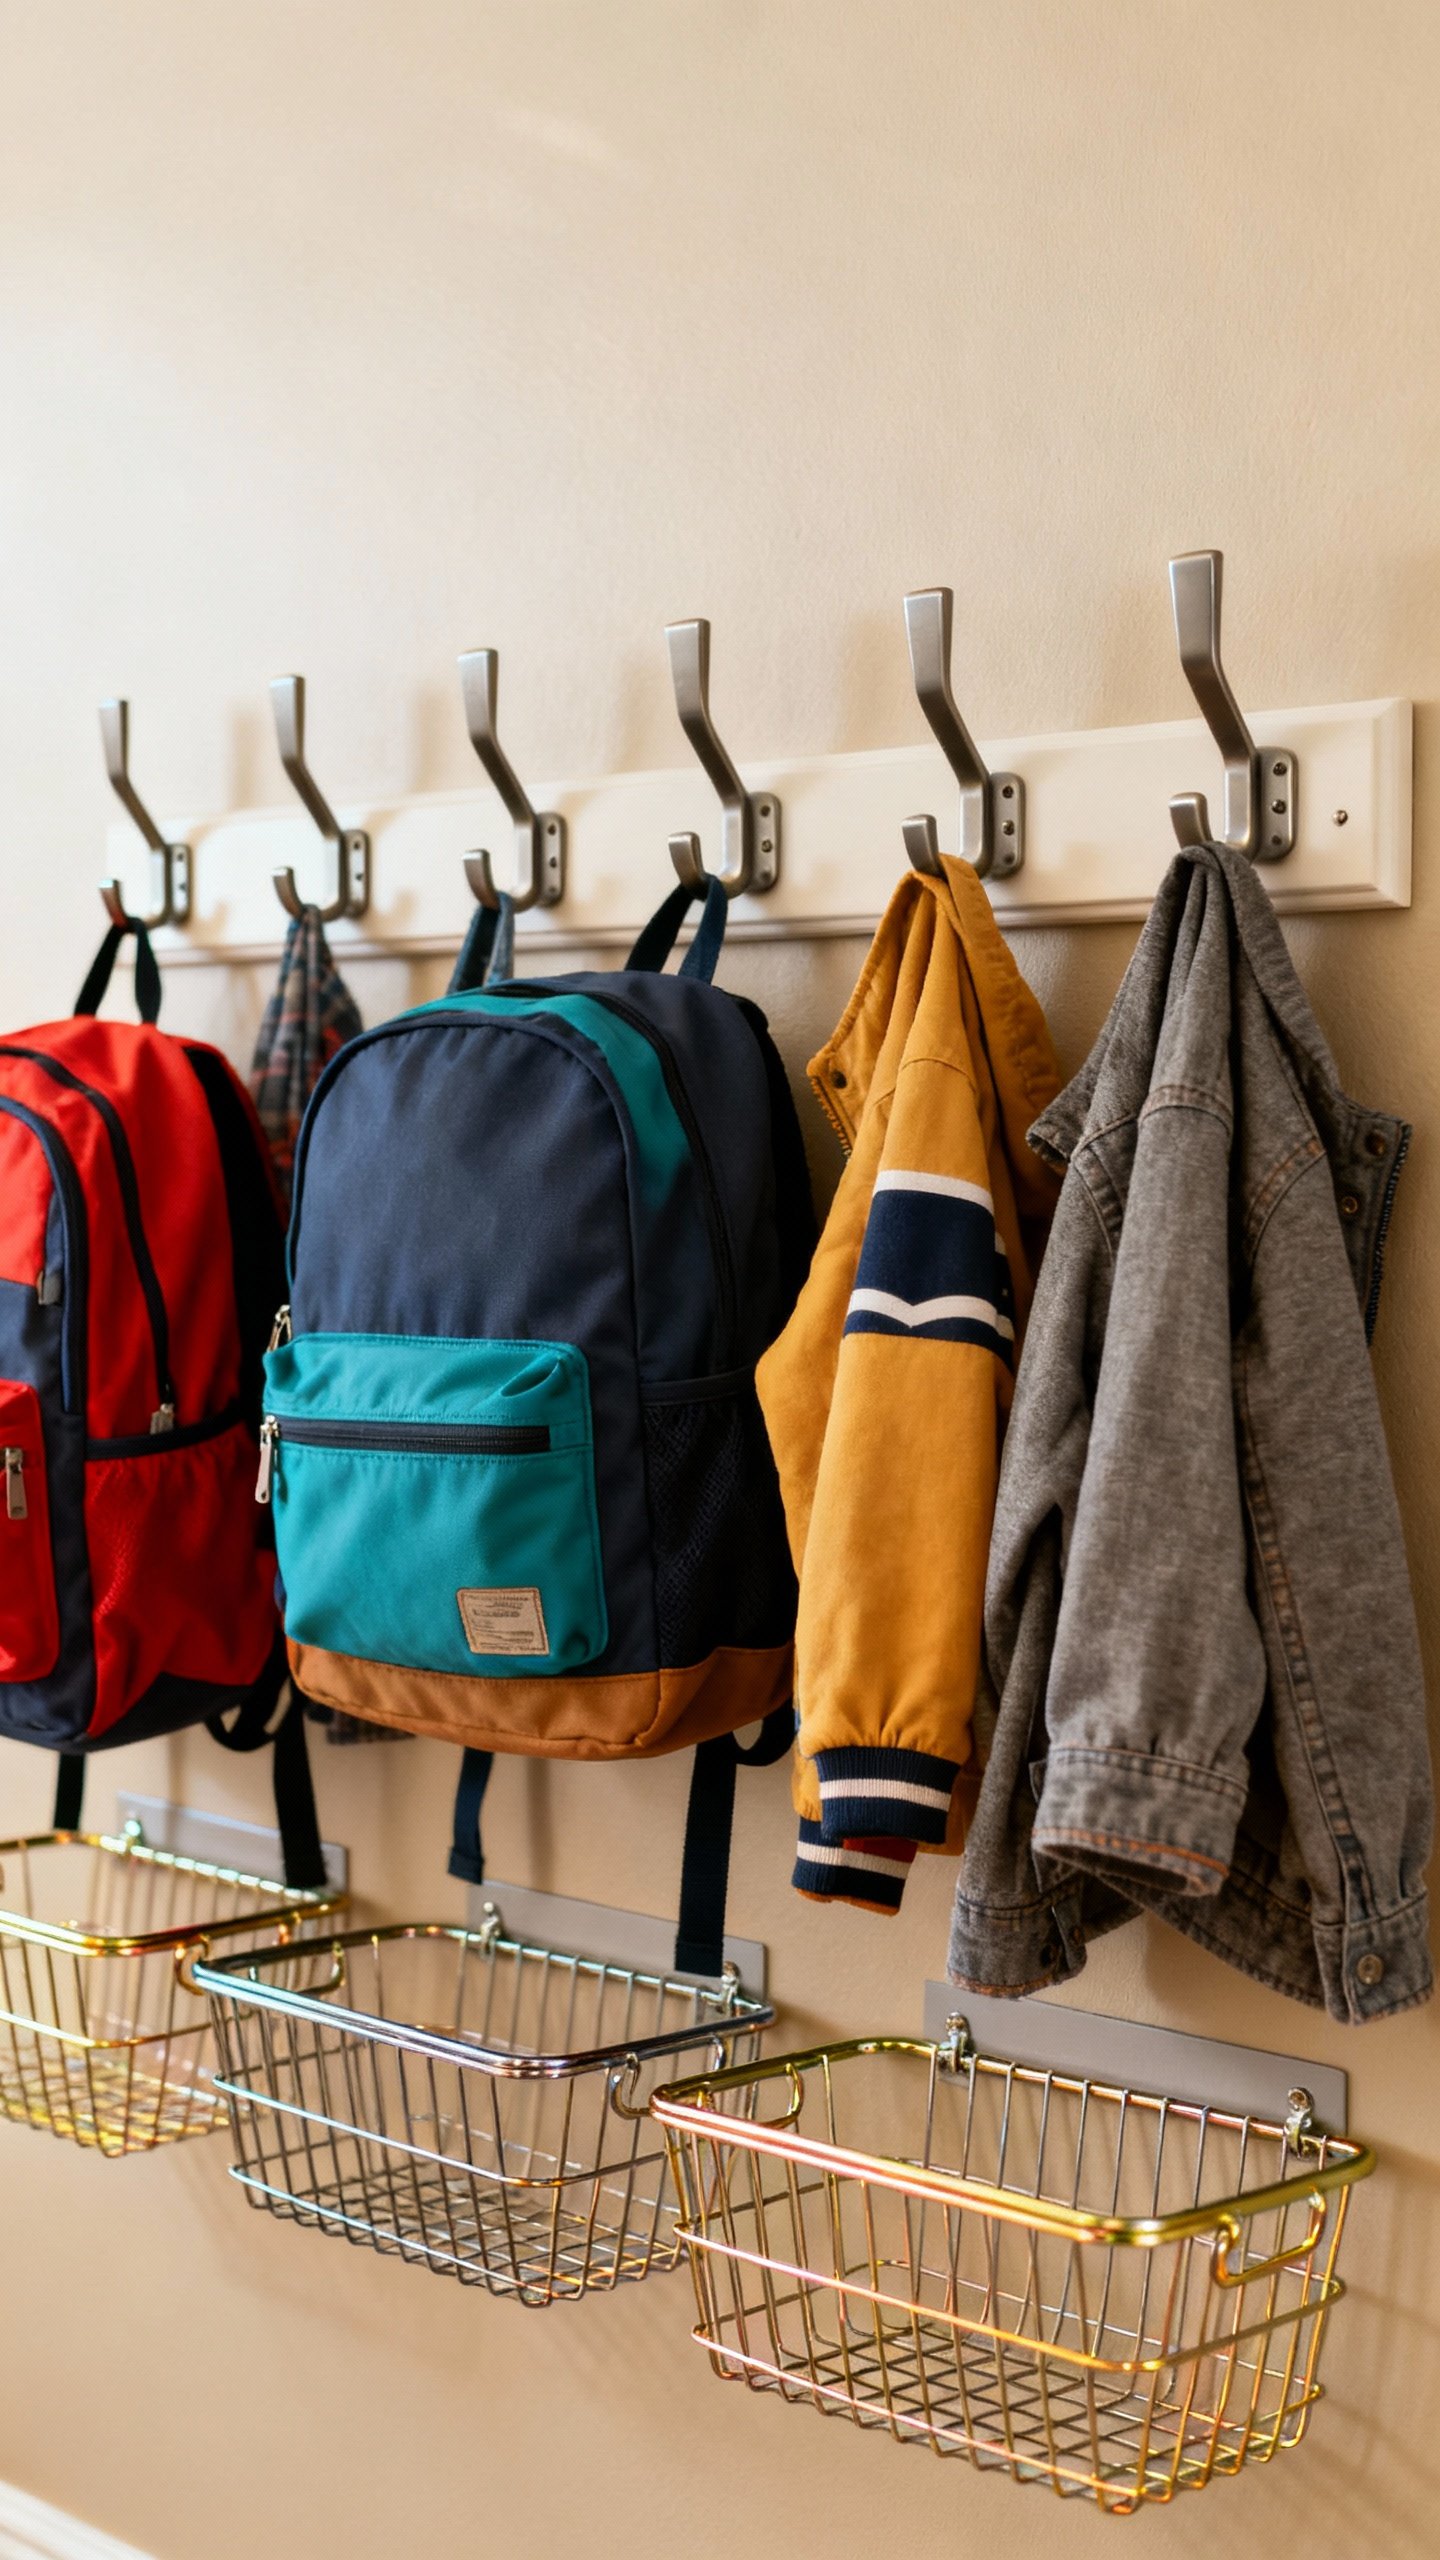
- Cubby/Hook zone: Bags, jackets, and lunch boxes live here every day.
- Checklist/Chore Board: Daily routines and responsibilities—clear, visible, and doable.
Optional Upgrades
– Meal plan strip or dinner menu (so you can stop answering “What’s for dinner?” 18 times). – Charging shelf for tablets and school laptops. – Pencil/pen cup and scissors so homework doesn’t stall out over missing supplies. – Rewards tracker for star charts or screen time.
DIY Hardware: What to Buy (Without a Remodel)
You can build this over a weekend with basic stuff. No custom carpentry required.
- Boards: One dry-erase board and one cork or magnetic board.
- Pocket organizers: Wall-mounted file holders labeled by kid.
- Hooks: 1-2 per child for backpack and coat. Use Command hooks if you rent.
- Cubbies or baskets: One for shoes or sports gear.
Wire baskets keep it real—you see what’s inside.
- Label maker or stickers: Kids engage more when they see their names. It’s science and ego.
- Timer and clock: Visual timers help morning routines. A simple analog clock works wonders.
Quick Layout That Works
– Top row: Calendar + cork/magnetic board for announcements. – Middle row: File pockets (Inbox/Outbox for each kid). – Bottom row (kid height): Hooks + baskets. – Side: Chore/routine chart and a small shelf for supplies.
Build It Step-by-Step
Let’s get practical.
Grab a pencil, tape measure, and your fearless attitude.
- Measure your wall. Sketch a simple layout. Keep boards at adult height, hooks at kid height.
- Mount the boards. Start with the calendar—this anchors your space. Add the cork/magnet board next.
- Install hooks and baskets. Mark each kid’s zone.
Keep them 10–12 inches apart so backpacks don’t fight.
- Add file pockets. Label “To Sign,” “To Return,” and “Keep at Home” or do one set per child.
- Post the routines. Morning and after-school checklists go where kids can tap them with a finger.
- Stock essentials. Pens, highlighters, sticky notes, tape, and a “lost and found” cup for mystery LEGO pieces.
Pro Tips That Save Your Sanity
– Use velcro strips for smaller items so you can rearrange as kids grow. – Choose wet-erase markers for the main calendar—less smudging. – Put a recycling bin nearby for paper clutter. – Keep a spare checklist in each backpack, FYI.
Kid-Friendly Features That Actually Work
Yes, we’re building this for kids, not just for a cute Instagram shot. Make it interactive and obvious.
- Color-coding: Assign each kid a color for calendar events, labels, and hooks.
- Picture cues: Use icons for younger kids—shoes, toothbrush, backpack, bed.
- Magnetic checklists: Kids move a magnet from “To Do” to “Done.” Satisfying and simple.
- Morning flow: Visual order: Wake up → Get dressed → Breakfast → Brush → Pack → Shoes.
- After-school flow: Snack → Empty folder → Homework → Pack for tomorrow → Free time.
Make It Theirs
– Let kids pick their basket color or a sticker for their hook. – Add a mini “Wins” board to celebrate little victories. – Include a small photo or drawing in each kid’s zone. Ownership = cooperation, IMO.
Digital Meets Analog: Hybrid System
Some families love apps.
Some love markers. You can have both. The command center runs daily life; your phone keeps long-term info.
- Share a digital calendar (Google/Apple) for recurring stuff and reminders.
- Sync weekly: Sunday night, update the wall calendar for the week ahead.
- Use QR codes: Link to bus schedules, school lunch menus, or practice maps.
Print and stick one near the calendar.
- Photo the board before busy weeks. Teen-proofing at its finest.
Maintenance: Keep It Alive, Not Dusty
A system works only if you maintain it. Good news: you can handle it in minutes a day.
- Daily (2 minutes): Clear the inbox, sign forms, reset checklists.
- Weekly (10 minutes): Sync the calendar, empty old papers, restock supplies.
- Monthly (15 minutes): Rotate chore charts, adjust hooks or baskets as seasons change.
- Seasonal: Swap swim gear for hats and gloves.
Label everything because stuff migrates.
Common Pitfalls (And Fixes)
– Too high: Kids ignore it. Lower the action items. – Too much: Over-designed = overwhelming. Strip it back to the Core Four. – No labels: Nobody knows where things go.
Label. Everything. – No routine: Build habits with two-minute check-ins morning and evening.
Budget-Friendly Alternatives
You don’t need designer bins to be organized. You need consistency.
- Use clipboards for schedules instead of boards—one per kid, hung in a row.
- Try shoe organizers for supplies and snacks.
Clear pockets = instant visibility.
- Repurpose magazine files for folders and homework.
- DIY magnetic boards with sheet metal and a frame.
Quick Starter Kit (Under $60)
– Dry-erase calendar ($15) – Two clipboards ($8) – Three wall hooks ($9) – Two wire baskets ($16) – Labels and markers ($10) Boom—functional and cute enough.
FAQ
How do I keep kids actually using the command center?
Make it part of the routine, not a suggestion. Do quick check-ins: “Backpack on hook? Folder in inbox?” Praise early and often.
Add small rewards for consistency—five checkmarks equals a fun privilege.
What if I have a small space?
Go vertical. Use a narrow strip with a calendar on top, one file pocket per kid, and two hooks below. Clipboards and Command hooks work in tiny corners.
The fridge can double as your calendar and chore zone.
How do I handle multiple kids with different schedules?
Color-code everything. Each kid gets a color on the calendar, a matching label on their hook, and dots on their folders. It keeps your brain happy and reduces “whose is this?” by, like, 90%, FYI.
Paper clutter still overwhelms me.
Help?
Set strict rules: anything that arrives goes to the “To Sign” pocket, you process it daily, and then it either gets filed or recycled immediately. Keep only what you truly need—snap photos of the rest for digital records.
Can I make it look stylish without losing function?
Yes! Pick a two-color palette, use matching frames or boards, and choose baskets in one texture (wire, rattan, or acrylic).
Just don’t hide the labels—pretty and practical can coexist, IMO.
What chores work best for young kids?
Keep it simple and visual: make bed, put shoes in basket, place folder in inbox, feed pet, wipe table with a damp cloth. Use icons and checkboxes. If it takes under five minutes, you’ll get better follow-through.
Conclusion
You don’t need a bigger house or a bigger brain—you need a smarter setup.
A family command center gives your kids independence and gives you time back. Start with the Core Four, keep it kid-height and labeled, and tweak as you go. It won’t end every meltdown, but it will tame the daily scramble—and that’s a serious win.
Explore More on FreeKidsHub
Jump into your favorite category for easy printables, fun activities, and family-friendly ideas — all in one place.
Tip: Add this block to the end of every post for stronger internal links ✨