Let’s be real: fine motor skills don’t magically appear because we wished on a Pinterest board. Kids develop them through playful, repeatable, hands-on stuff that fits their needs and interests. The good news?
You don’t need a sensory gym in your living room. You can build powerful, joyful, DIY fine motor activities with things you already have—without selling a kidney for specialty tools.
Why Fine Motor Skills Matter (and How to Keep It Fun)
Fine motor skills help kids grasp crayons, button shirts, and open snack bags—aka basic life wins. For many kids with special needs, these skills need more practice and more creative paths to success.
We can tweak activities for different sensory profiles, strengths, and challenges.
Keep it short, make it silly, and quit while it’s still fun. Want buy-in? Let kids choose themes—dinosaurs, space, glitter explosions (you’ve been warned).
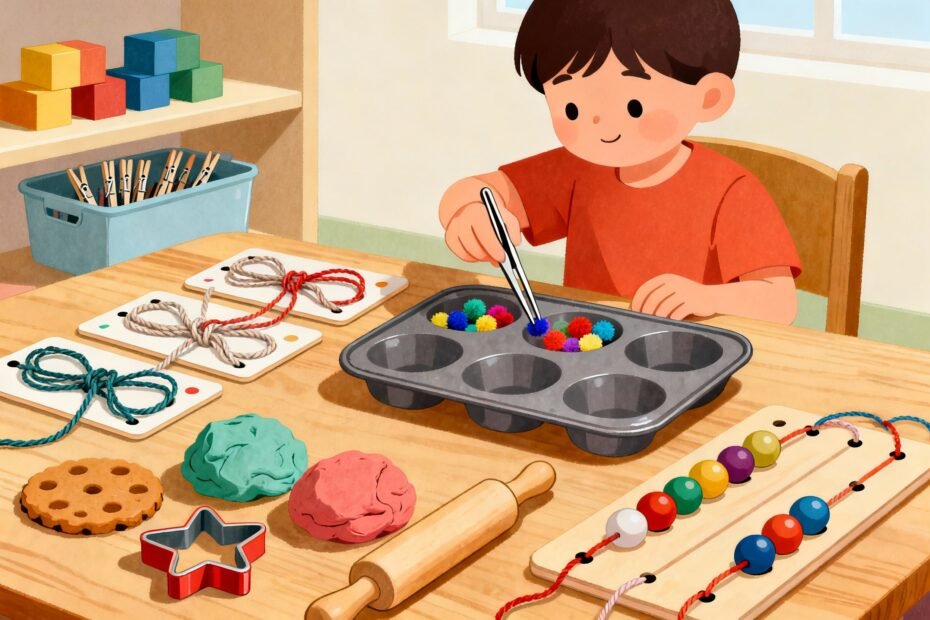
Set the Stage: Simple DIY Tools That Do the Heavy Lifting
- Adaptive grips: Wrap pencils or utensils with foam tubing, rubber bands, or hair ties for better hold.
- Non-slip surfaces: Use a baking mat or shelf liner so papers and bowls stop escaping.
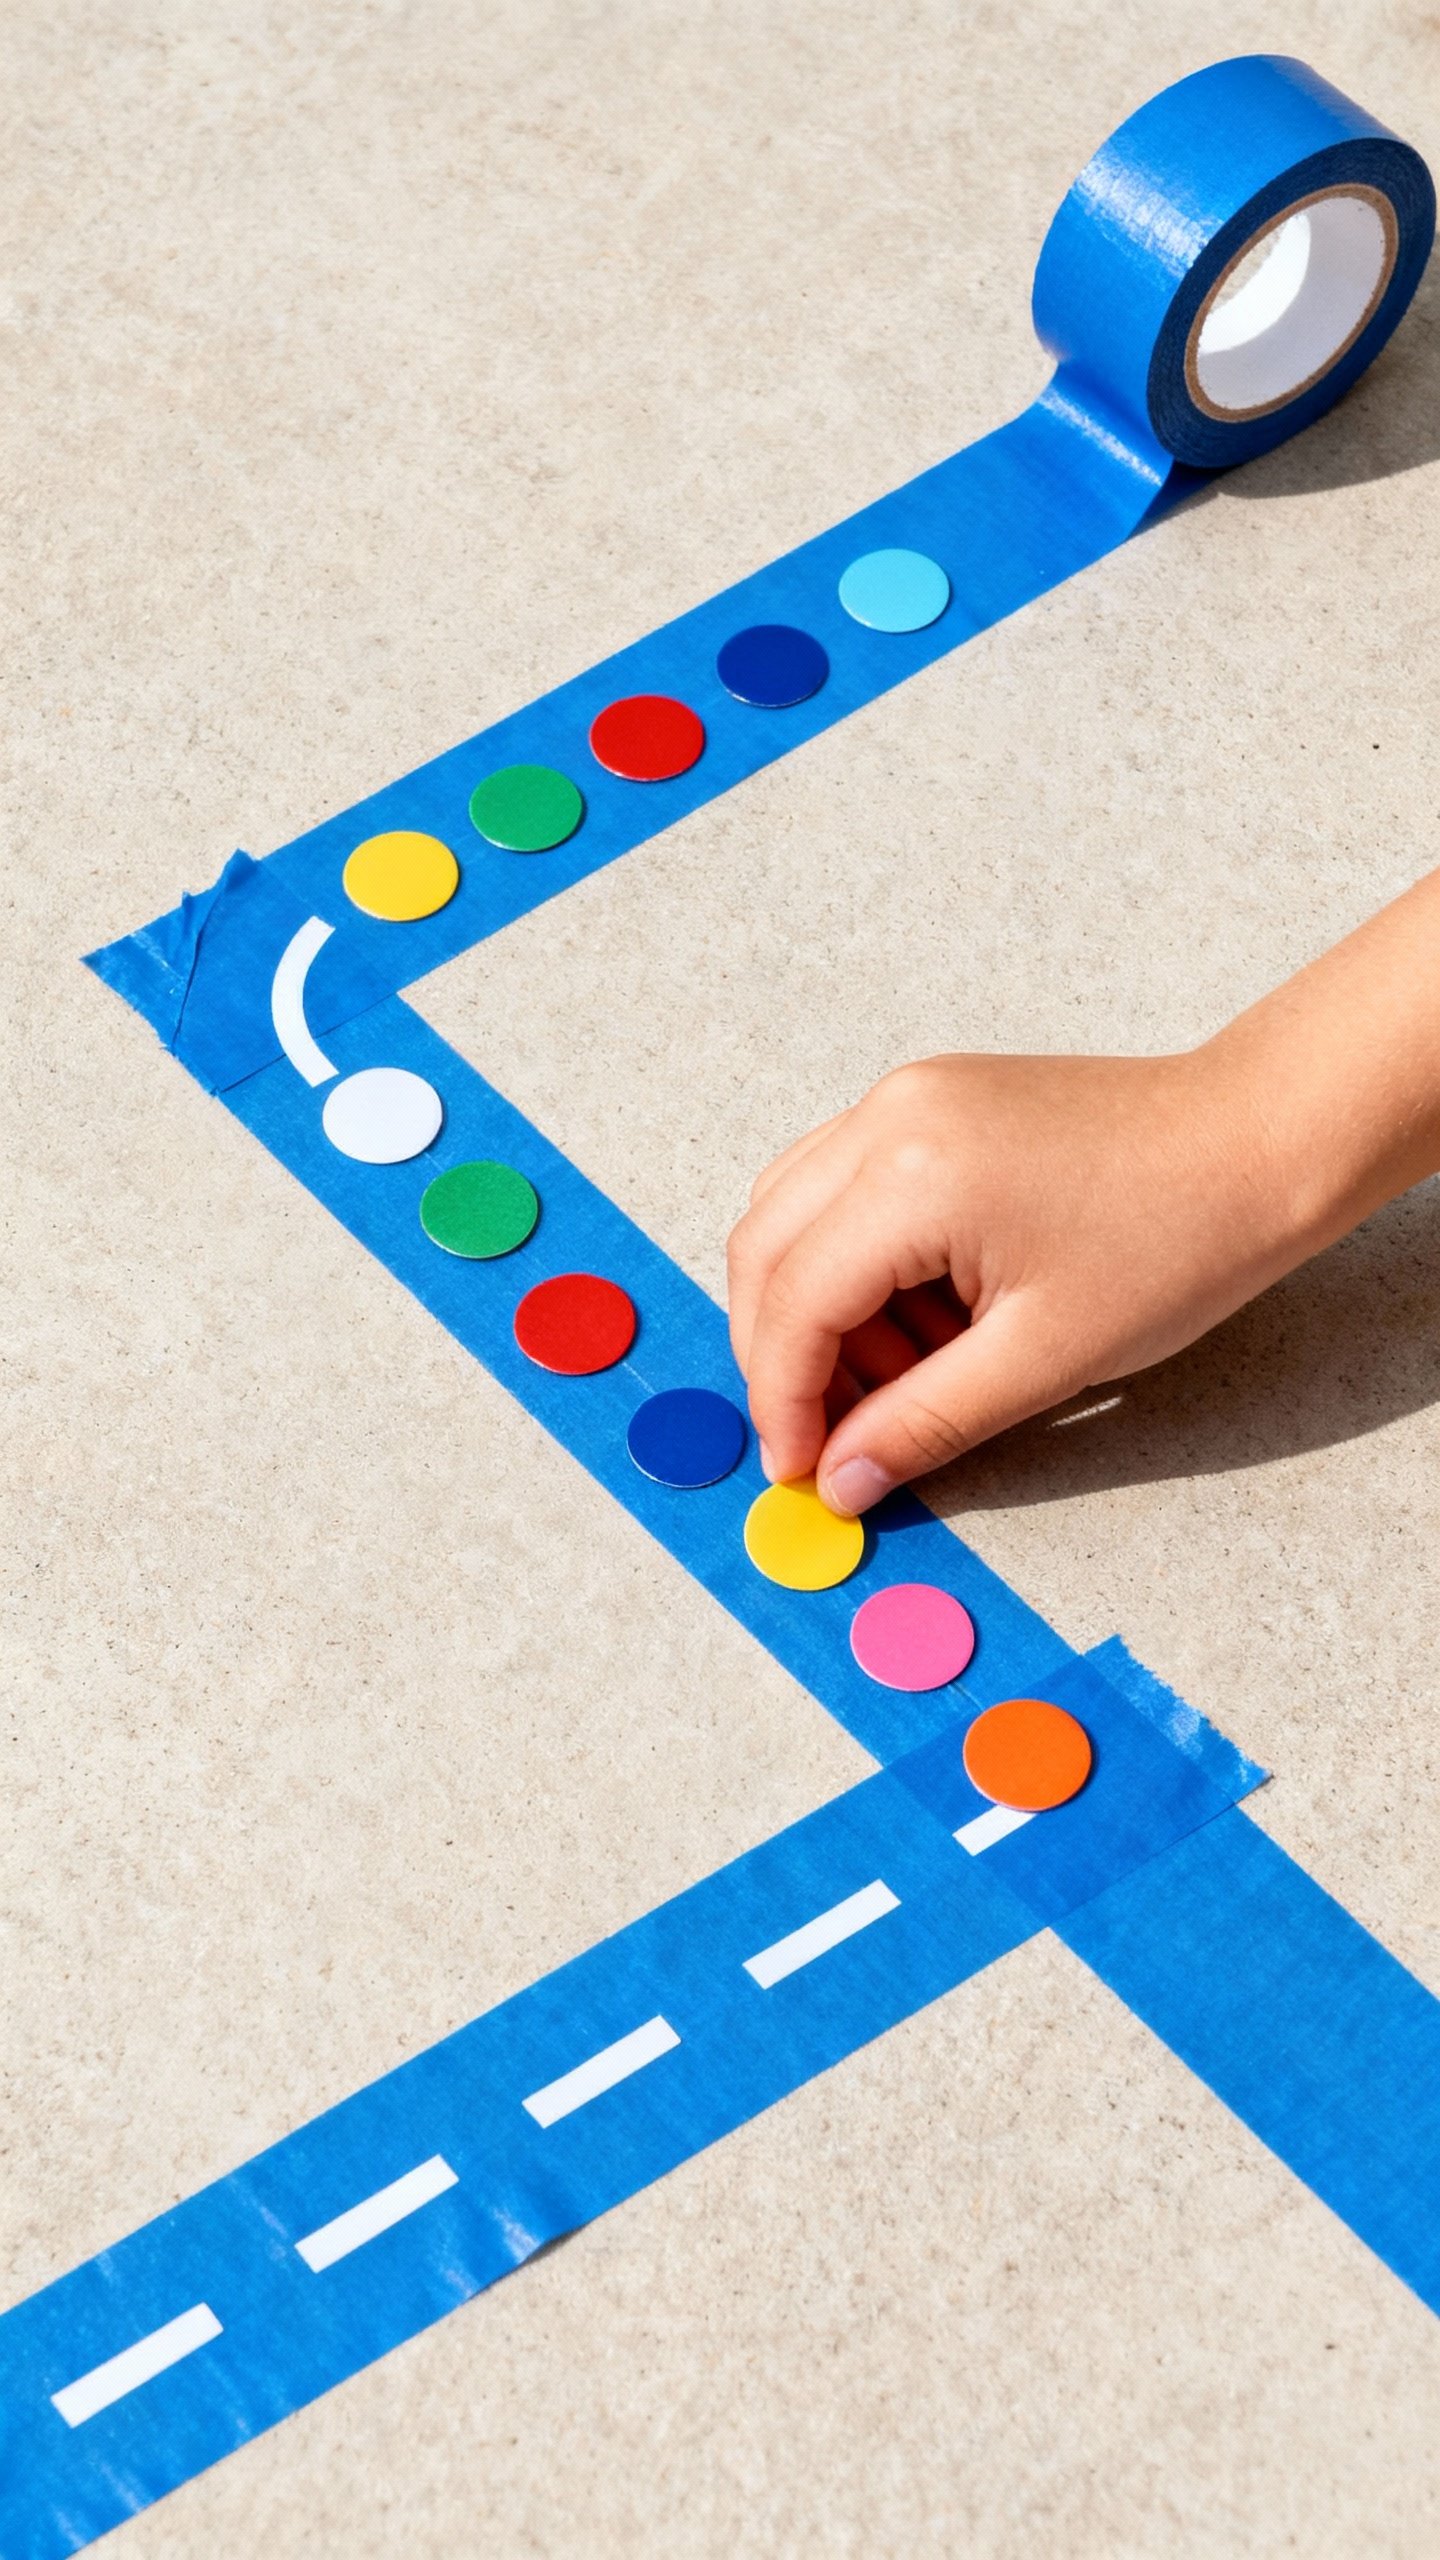
- Visual boundaries: Painter’s tape makes tidy “work zones.” Instant focus boost, IMO.
- Small containers: Muffin tins, ice cube trays, and egg cartons sort tiny items like champs.
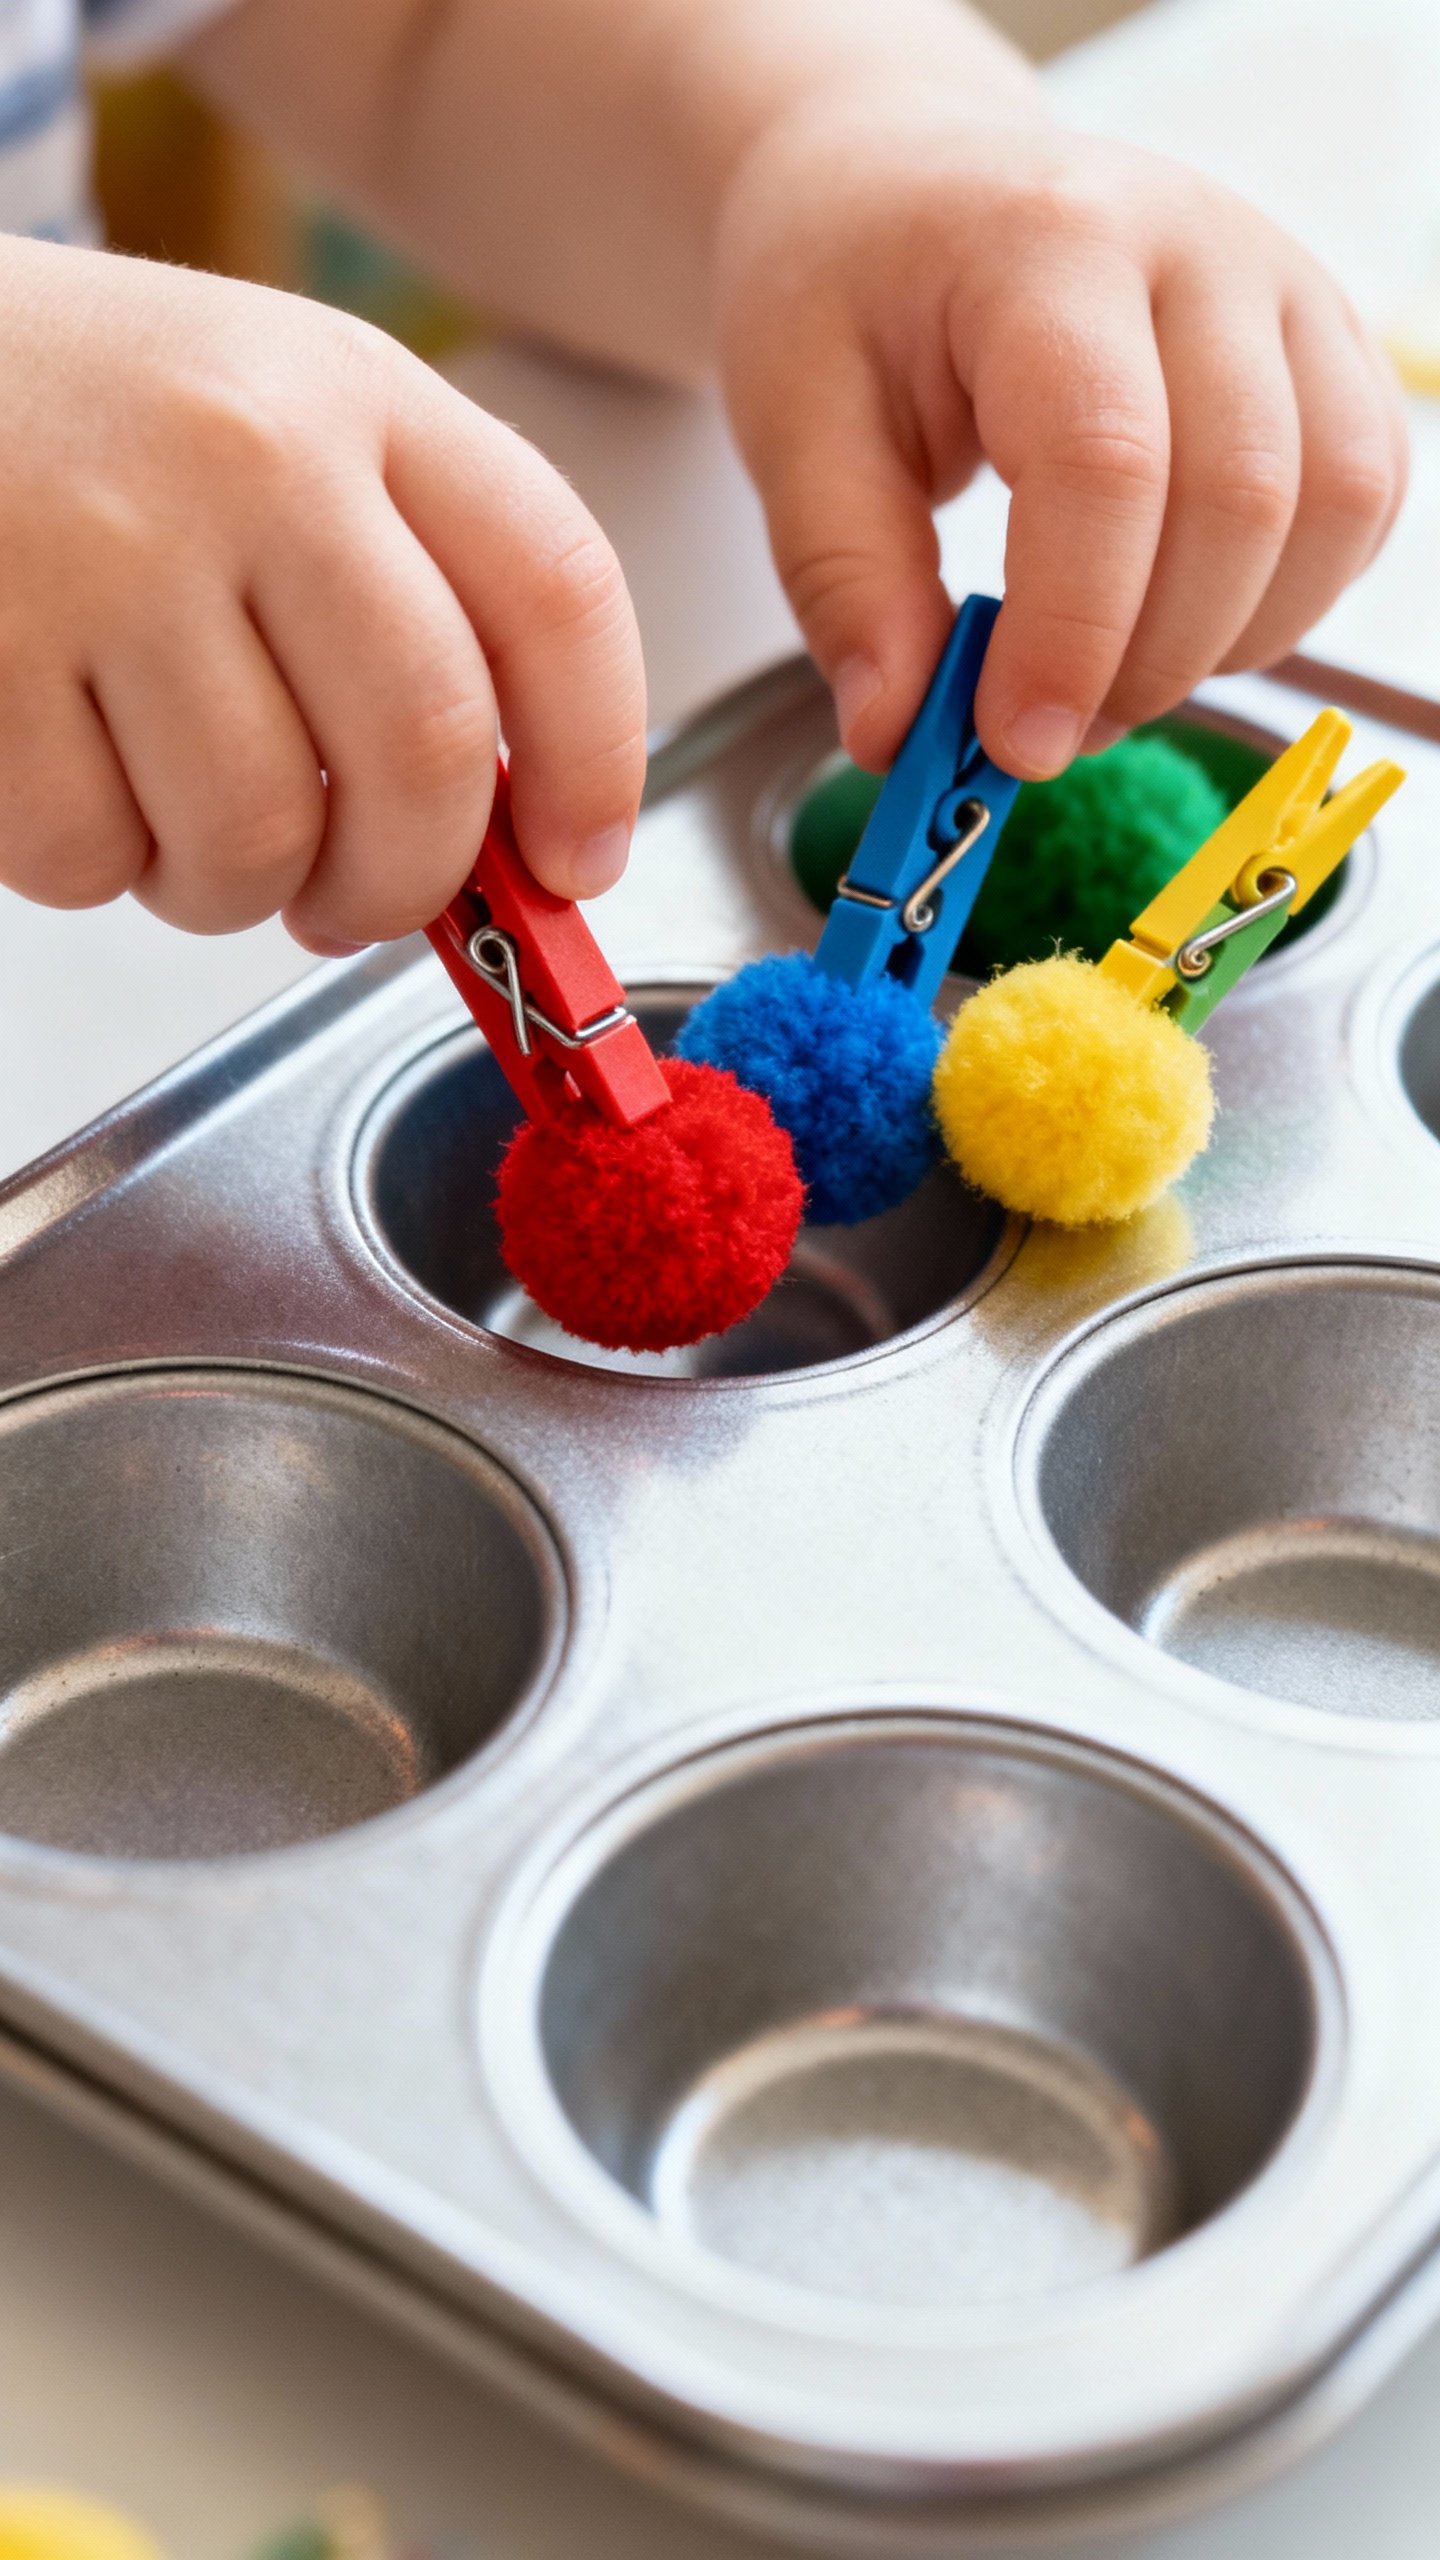
- Easy tongs: Use clothespins, chip clips, or salad tongs as hand-strength trainers.
Activity Ideas You Can Start Today
1) Pom-Pom Rescue Mission
Dump pom-poms (or cotton balls) into a bowl.
Add tongs or clothespins. Create “rescue stations” in muffin tin cups and assign colors.
- Targets: Pincer grasp, hand strength, bilateral coordination.
- Make it easier: Use bigger pom-poms and larger tongs.
- Make it harder: Time it, or use tweezers for teeny items.
2) Sticker Paths and Tape Trails
Lay down painter’s tape roads on a table. Kids place dot stickers along the line or peel tape off slowly.
- Targets: Precision, finger isolation, wrist stability.
- Pro tip: Draw arrows to guide direction.
You can even add a “stoplight” sticker.
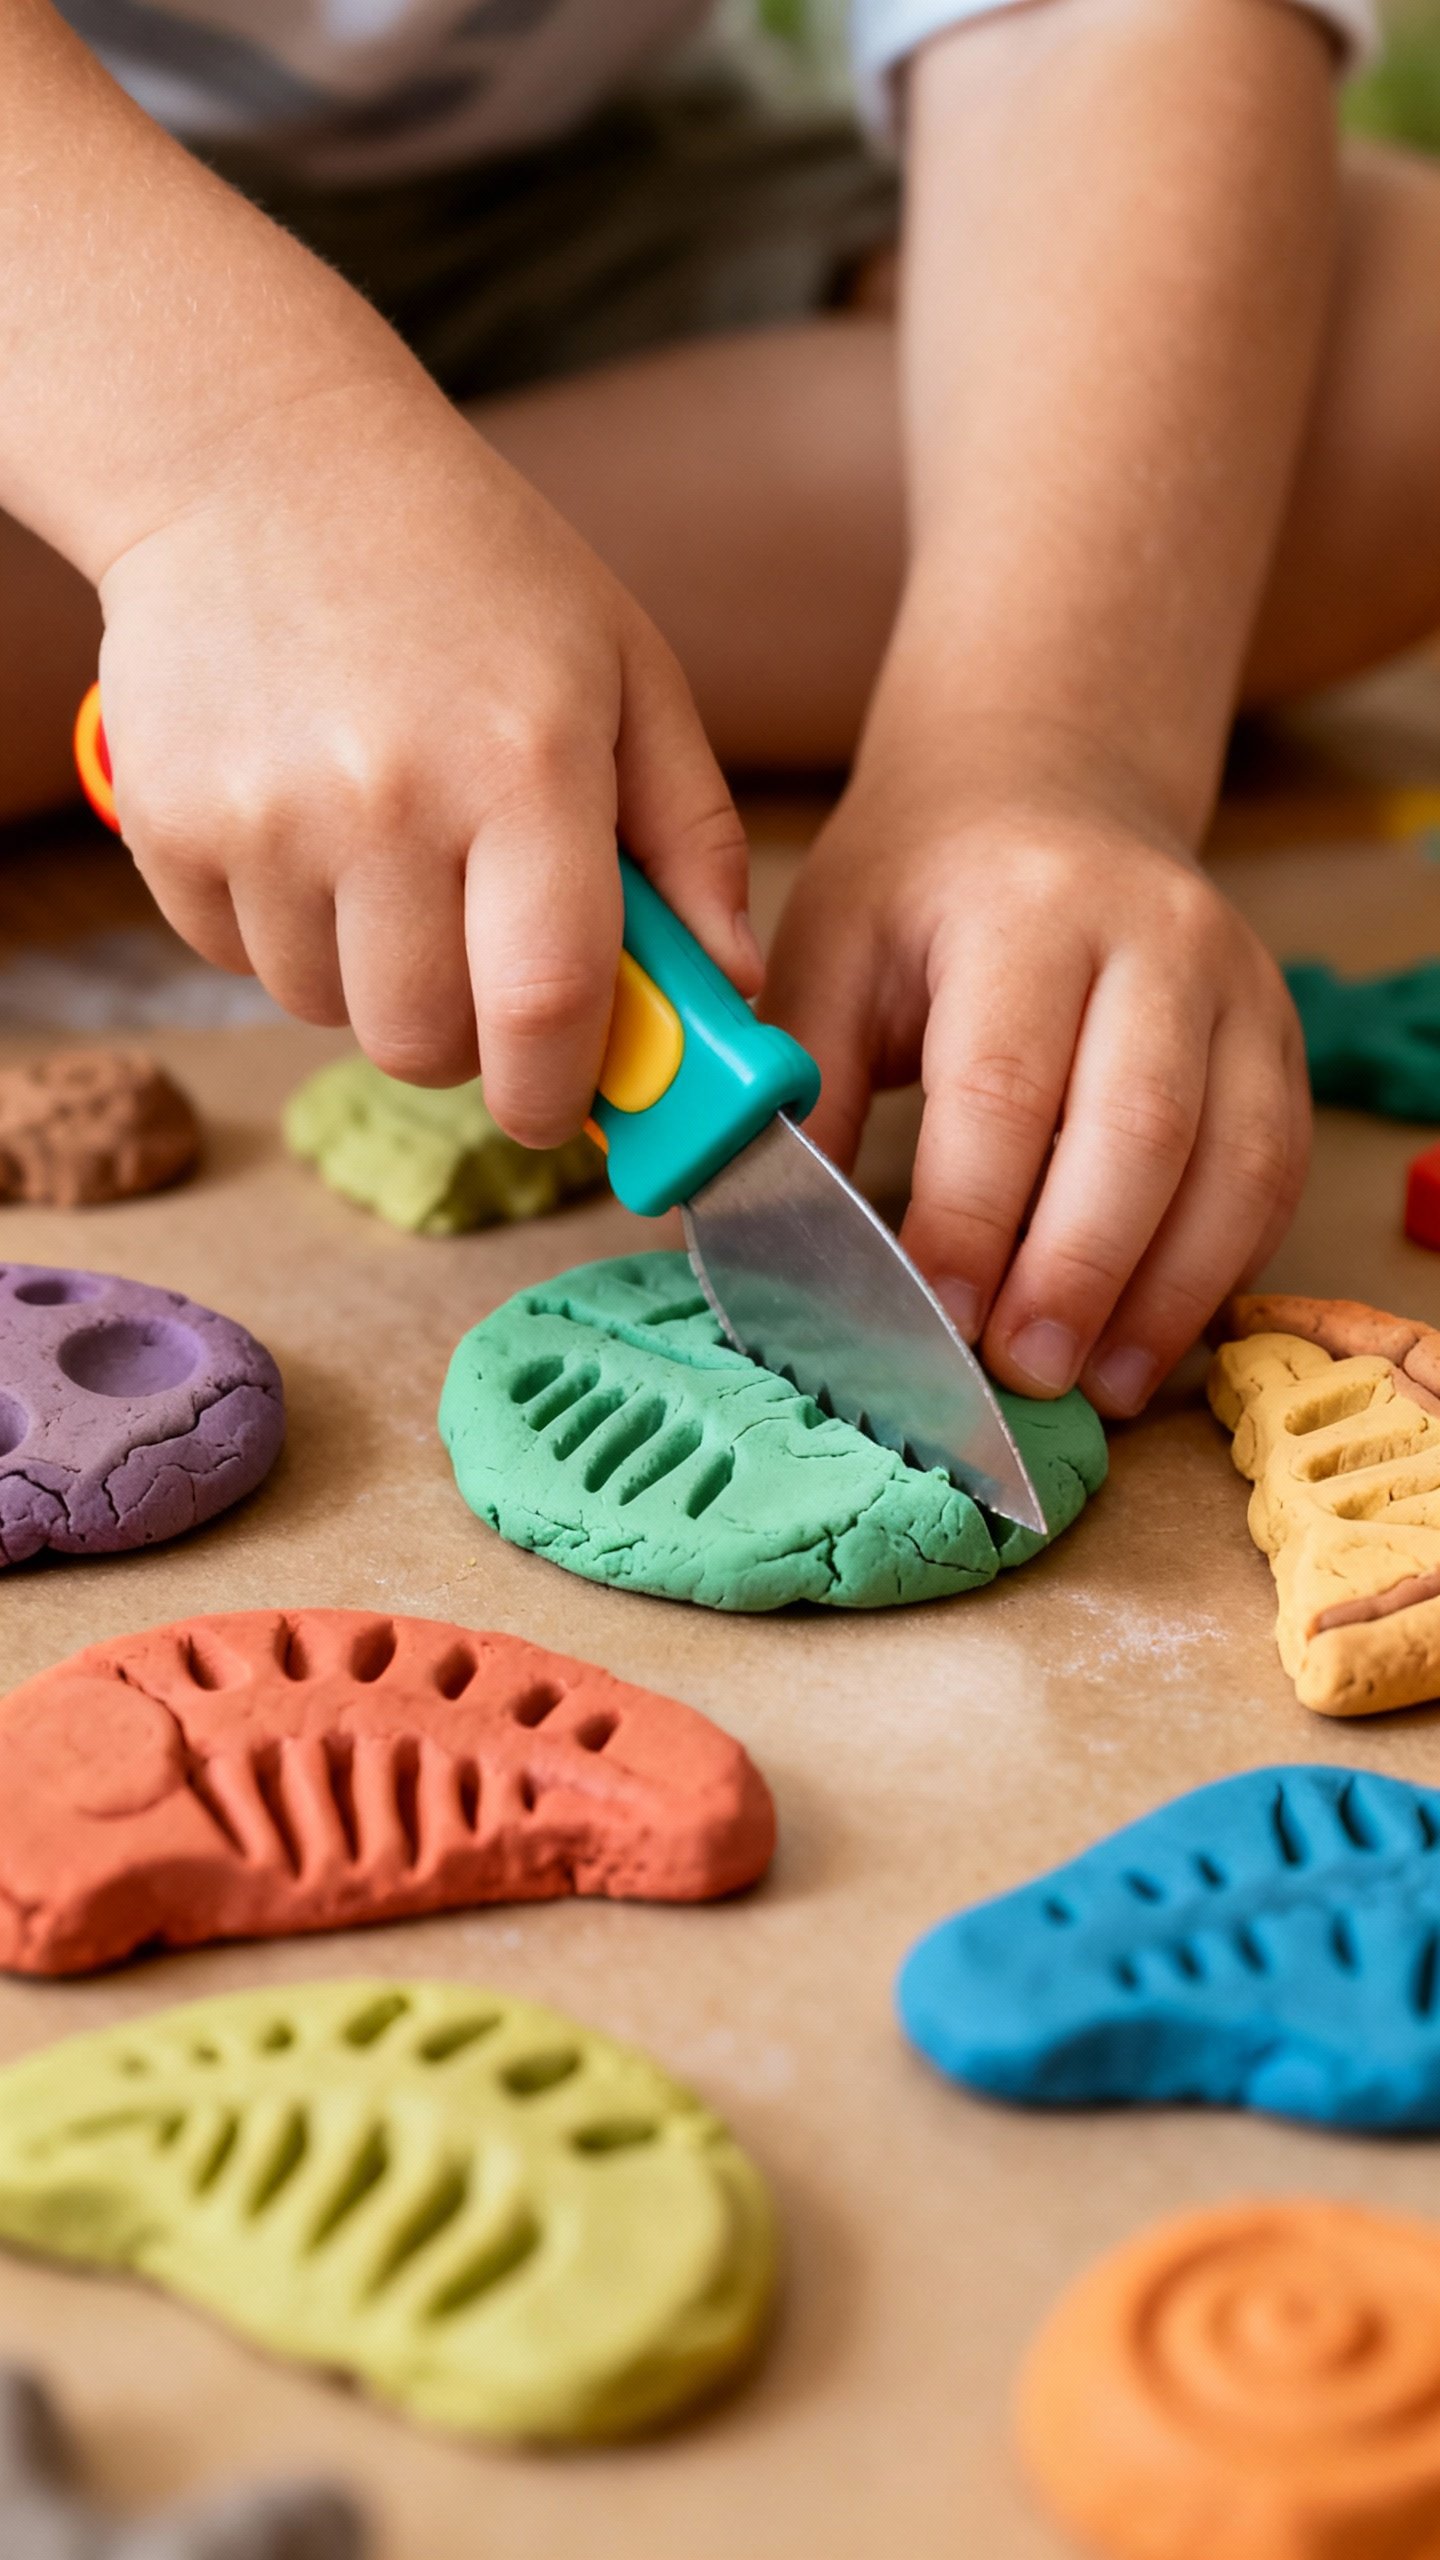
3) Playdough Power Lab
Roll it, pinch it, cut it. Hide beads or buttons inside and call it a “fossil hunt.” Use a plastic knife or a child-safe pizza cutter for slicing practice.
- Targets: Hand strength, intrinsic hand muscles, tool use.
- Sensory note: If playdough feels icky, try kinetic sand or cloud dough (cornstarch + conditioner).
4) Button Snake and Bead Necklaces
Thread felt squares (with slits) onto a ribbon with a big button sewn on one end. Or string chunky beads onto a shoelace or pipe cleaner.
- Targets: Bilateral coordination, sequencing, pincer grasp.
- Make it accessible: Use larger holes and stiffer cords.
Shrink the size as skills grow.
5) Spray, Squeeze, Wipe
Give kids a spray bottle and microfiber cloth. Let them spritz windows, plants, or a dry-erase board. Add a sponge for squeeze-and-release practice.
- Targets: Hand strength, endurance, wrist extension.
- Bonus: Your house gets cleaner.
Sort of.
6) Coin Drop and Slot Boxes
Cut slits in a lidded container. Drop in coins, buttons, or milk caps. Draw pictures on each slot to add a matching game.
- Targets: Pincer grasp, in-hand manipulation, visual-motor integration.
- Safety: Supervise small items.
Use larger caps if needed.
7) Q-Tip Painting and Dot Art
Dip cotton swabs into paint and dot along lines or inside shapes. Try letters or simple pictures.
- Targets: Precision, grip control, visual tracking.
- Level up: Use thinner lines, smaller dots, or timed patterns.
Turn Everyday Tasks into Fine Motor Wins
Don’t sleep on chores. Real-life tasks train real-life muscles—and kids usually feel proud when they help.
- Food prep: Peel bananas, tear lettuce, spread butter with a child-safe knife, scoop with measuring spoons.
- Laundry: Match socks, pinch clothespins, turn sleeves right-side-out.
- Art corner: Tear paper for collages, roll tape, push stickers, squeeze glue bottles (with tiny dots).
- Self-care: Practice zippers, snaps, and Velcro on dolls or a “fastener board.”
Adapt for Sensory Needs Without Killing the Vibe
For Kids Who Avoid Mess
- Offer tools first: spoons, brushes, gloves, or bagged materials (paint in a zip bag = mess-free squish).
- Start with dry textures: rice, beans, dry pasta before wet or sticky stuff.
- Keep sessions short and predictable.
Countdown timers help.
For Kids Who Seek Big Input
- Use heavier tools (weighted pens or thick markers) and thicker materials (putty instead of playdough).
- Add resistance: hole punchers, theraputty, rubber bands around containers.
- Mix gross motor bursts: wall push-ups, animal walks, then seated fine motor. FYI, it often boosts focus.
For Visual or Motor Planning Challenges
- Use high-contrast colors and bold borders around work areas.
- Break steps into tiny chunks with picture cues or quick modeling.
- Offer one or two choices at a time to reduce overwhelm.
Build Skills with Playful Progressions
Start where your kiddo succeeds and turn the dial slowly. Tiny wins stack up fast.
- Size and stability: Large, stable items first (big beads, stiff cords), then smaller, floppier ones.
- Grip challenges: Move from whole-hand tools (tongs) to pincer tasks (tweezers, small buttons).
- Speed and accuracy: Start slow and steady, then add speed, patterns, or time limits.
- Visual complexity: Begin with single colors or shapes, then mix sets and add distractions.
Motivation Tricks That Don’t Involve Bribing with a Pony
- Choice boards: Let kids pick the activity, tool, or theme.
Autonomy equals buy-in.
- Micro-goals: “Place 5 stickers” feels doable. Celebrate, then ask, “Want to try 3 more?”
- Game-ify it: Timers, scoreboards, or silly “boss levels” keep things fresh.
- Connect to interests: Trucks, unicorns, sharks—customize materials to their obsessions.
- Stop on a high note: End with success so they want more tomorrow. IMO, this is the secret sauce.
Quick Safety and Accessibility Notes
- Supervise small items if choking risk exists.
Swap in larger objects as needed.
- Use child-safe scissors and blunt tools. Dull blades frustrate; sharp enough to cut paper is fine.
- Mind fatigue. Hand muscles tire fast—2–10 minute bursts beat marathon sessions.
- If something causes pain or meltdowns repeatedly, pause and adjust.
Comfort first, always.
FAQs
How often should we do fine motor activities?
Short daily bursts work best—think 5–15 minutes sprinkled into routines. Attach them to existing habits like after snack or before story time. Consistency beats intensity every time.
What if my child refuses messy play?
Start with non-messy alternatives like tweezers and beads, dry sensory bins, or paint-in-a-bag.
Offer tools and gloves. Gradually step toward mess with quick, low-stress exposures. Celebrate any attempt—even a fingertip touch.
Do we need fancy therapy tools?
Nope.
Household items work great: clothespins, tape, Q-tips, muffin tins, rice, buttons, pipe cleaners. If you want one “extra,” theraputty or a quality hole punch adds great resistance work.
How do I know if an activity is too hard?
Watch for clenched jaws, speed drops, avoidance, or meltdowns. If that happens, simplify: bigger pieces, fewer steps, clearer visuals, or more support.
Aim for “challenging but doable,” not “Hercules-level grind.”
Can these activities help with handwriting?
Yes—indirectly. Stronger hands, better finger control, and improved visual-motor skills make writing easier. Pair these with short tracing, tracing on vertical surfaces, and grip practice for best results.
What if my child has significant motor delays?
Collaborate with an occupational therapist if possible.
They can tailor activities, suggest adaptive tools, and track progress. You can still do these DIY ideas—just scale size, pace, and support to your child’s needs.
Conclusion
You don’t need a Pinterest-perfect setup to build strong little hands. You just need a few household items, a dash of patience, and a sense of play.
Keep it short, keep it joyful, and tweak as you go. Big skills grow from small, everyday wins—no glitter explosion required (unless you’re into that).
Explore More on FreeKidsHub
Jump into your favorite category for easy printables, fun activities, and family-friendly ideas — all in one place.
Tip: Add this block to the end of every post for stronger internal links ✨