You know that stash of bubble wrap lurking in your closet “just in case”? Yeah, it’s time to set it free. Bubble wrap art for kids turns simple packing materials into bright, textured masterpieces—and it doesn’t require a hazmat suit for cleanup.
We’re talking minimal mess, big smiles, and a legit way to keep little hands busy. Bonus: you might find yourself joining in because popping while painting is basically therapy.
Why Bubble Wrap Art Totally Slaps
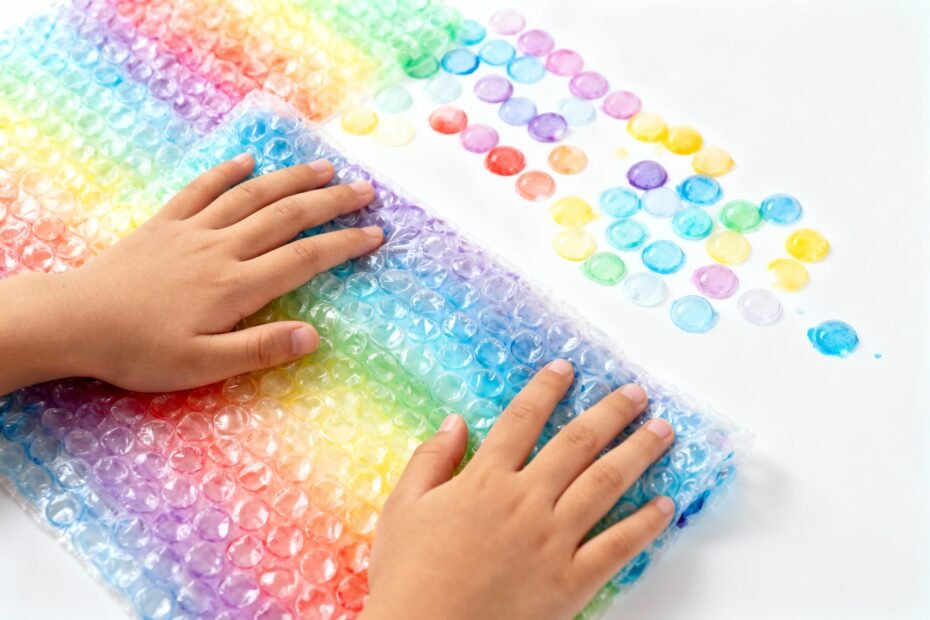
Bubble wrap prints look way cooler than they have any right to. The texture does the heavy lifting, so kids get instant arty payoffs without complicated steps.
You’ll get cool dot patterns, funky scales, and surprising color blends. Plus, it’s budget-friendly, fast to set up, and easy to clean. No fancy supplies.
No “how do I remove acrylic from my cat” moments. IMO, it’s the perfect rainy-day project.
Supplies You Probably Already Have
- Bubble wrap (any size—small bubbles = detail, big bubbles = drama)
- Washable tempera or kids’ craft paint
- Paper (cardstock holds up best)
- Paint rollers or foam brushes (optional, but nice)
- Tape (painter’s tape or masking tape)
- Wipes or damp cloth for quick cleanup
- Apron or old shirt (for the enthusiastic artists)
Pro tip: Cut bubble wrap into manageable sheets before you start. You’ll thank yourself when tiny hands get grabby.
Zero-Mess Setup (For Real)
You can do this without turning your dining table into a Jackson Pollock crime scene.
- Cover your surface with a reusable silicone mat or an old tablecloth.
- Tape bubble wrap bubble-side up to the table so it doesn’t slide.
- Put small blobs of paint on a palette or plate.
Limit to 2–3 colors per print to avoid mud.
- Place paper nearby so kids can stamp fast.
Cleanup hack: Wipe bubble wrap with a damp cloth and reuse it. No sinks, no drama.
Basic Technique (a.k.a. The Print That Never Fails)
- Roll or dab a thin layer of paint onto the bubbles.
Think light coat, not frosting a cake.
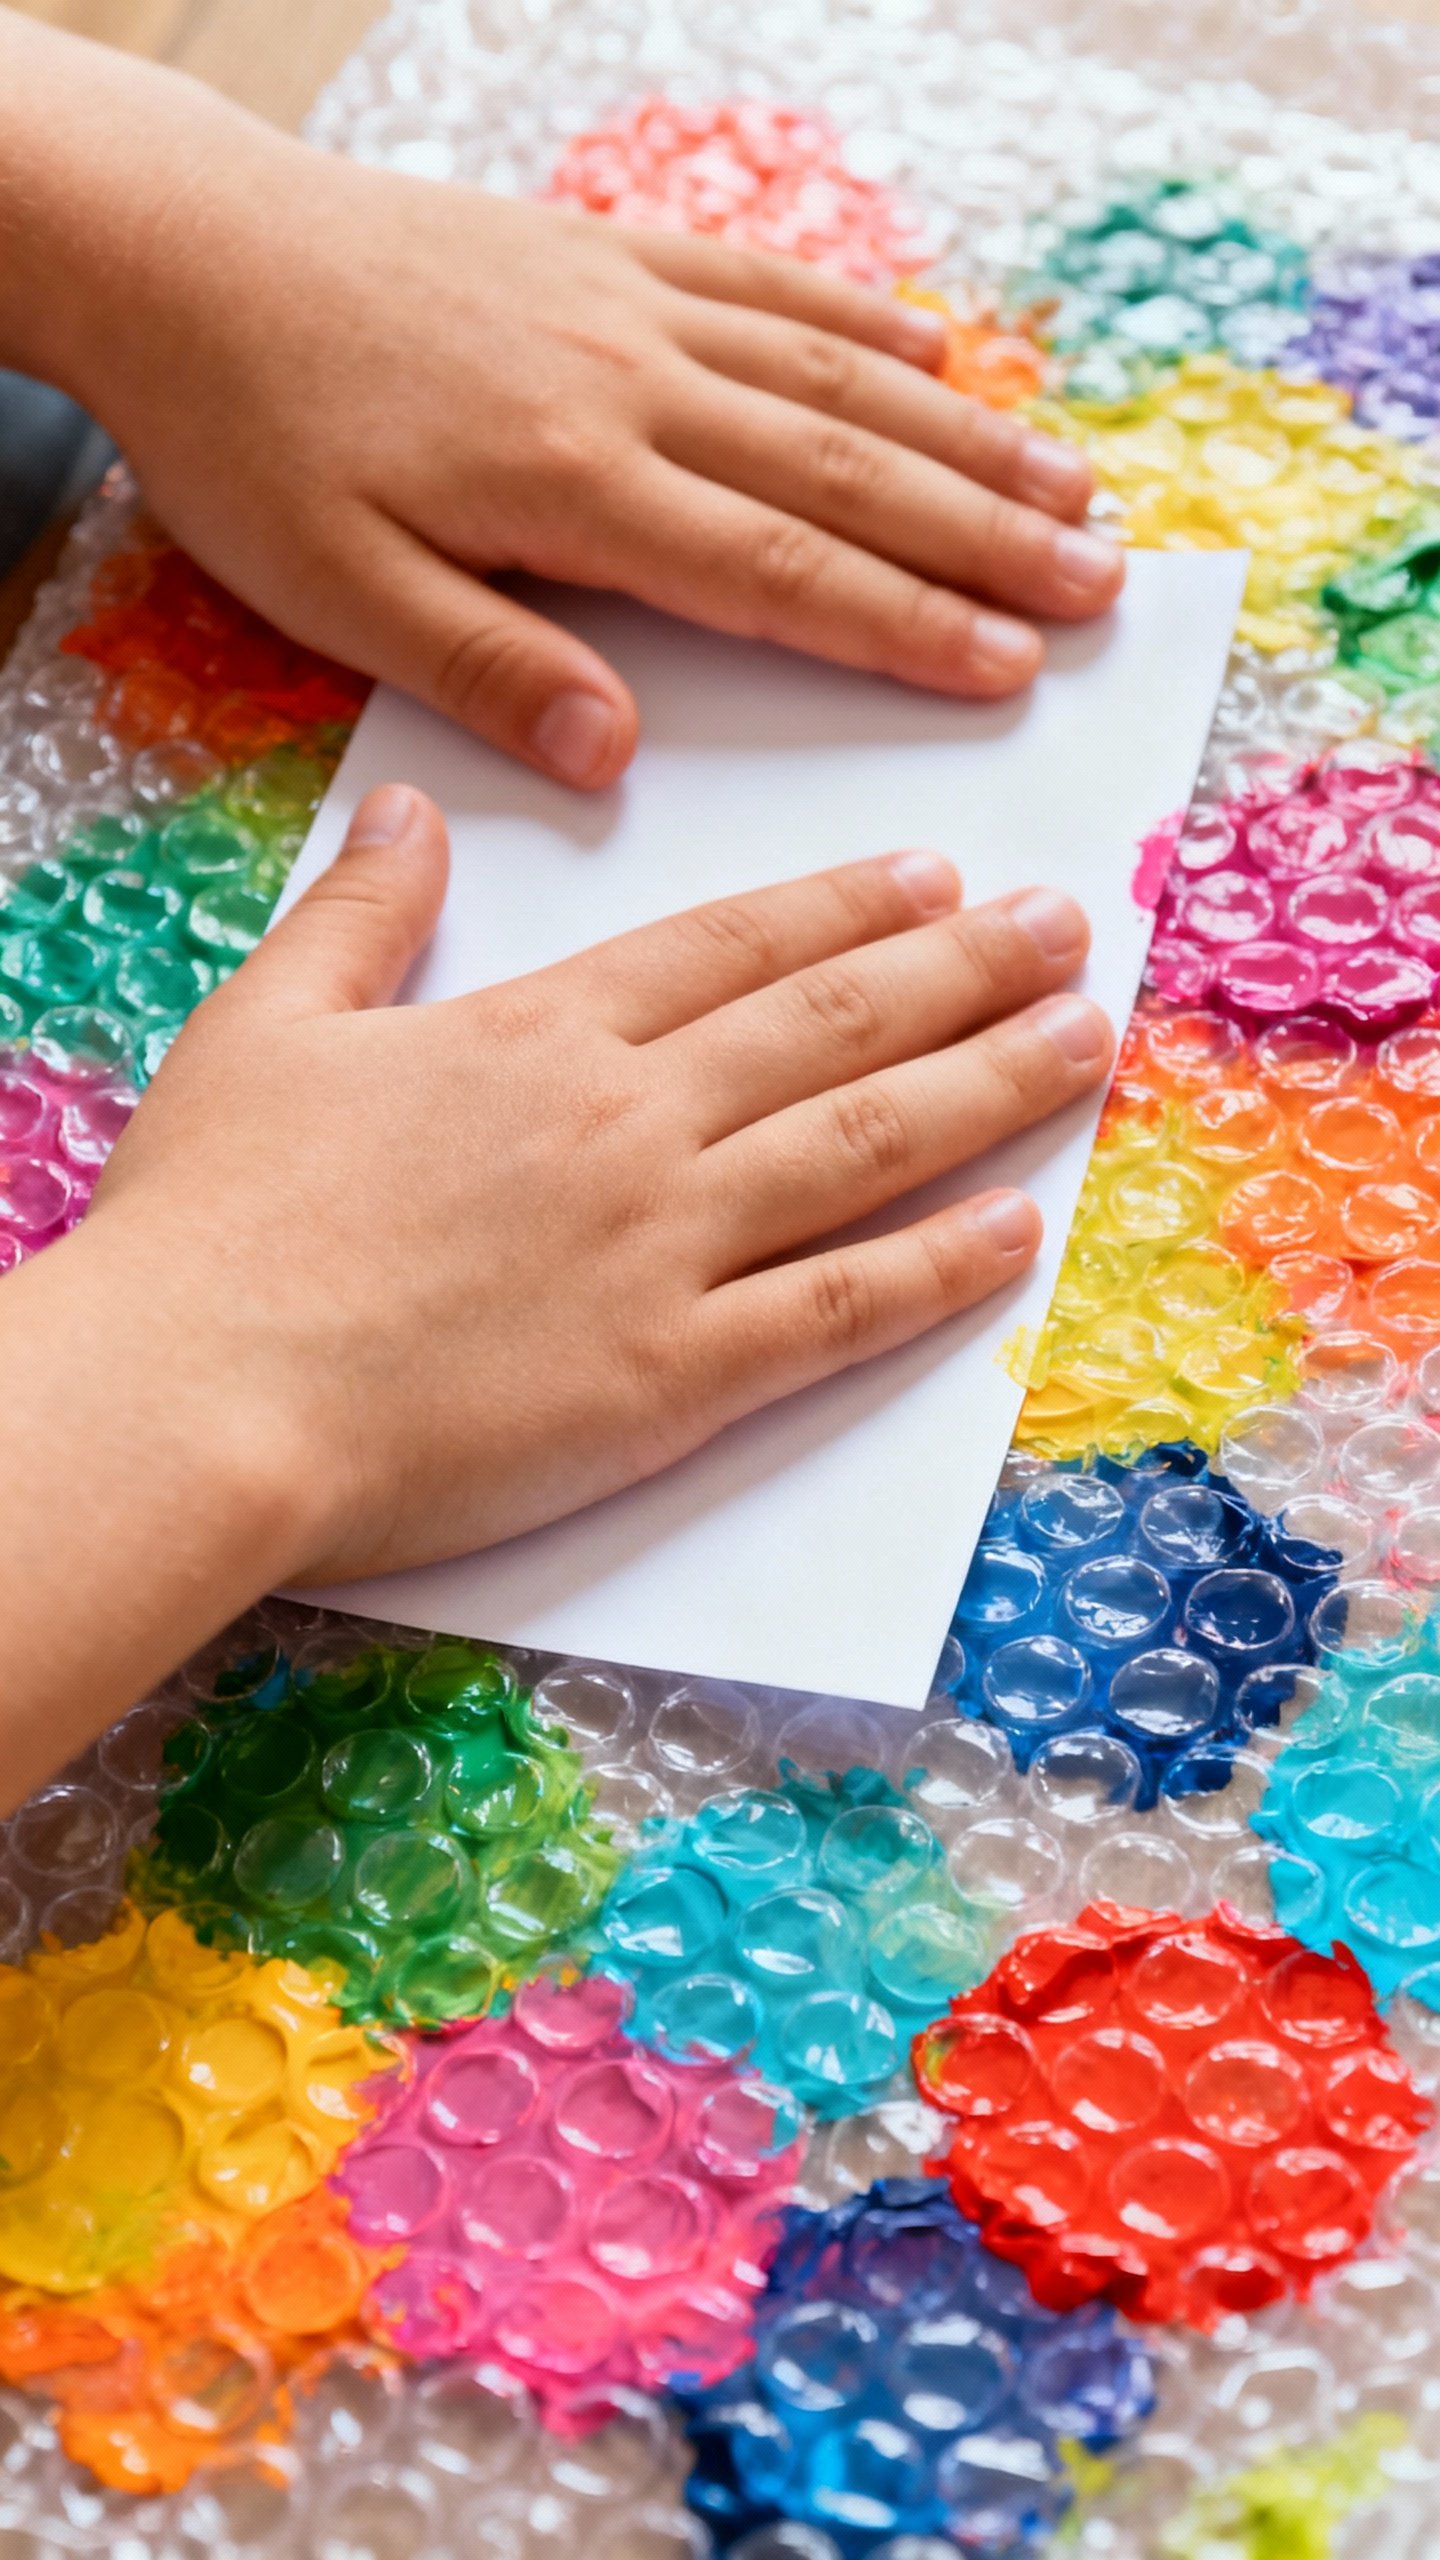
- Flip paper onto the painted wrap, press gently with hands, then peel off.
- Boom. Instant pattern. Let it dry and call it wall-worthy.
FYI: If kids glob it on, you’ll get smudgy blobs.
Still cute, just less dotty. Light pressure = crisp dots.
Try the “Stamp and Lift” Method
Instead of laying paper on top, pick up the bubble wrap like a stamp and press it onto the paper. This works great for layering colors and making shapes.
Creative Variations That Kids Love
Once they nail the basics, kick it up a notch.
Here are easy twists that look impressive with almost no extra effort.
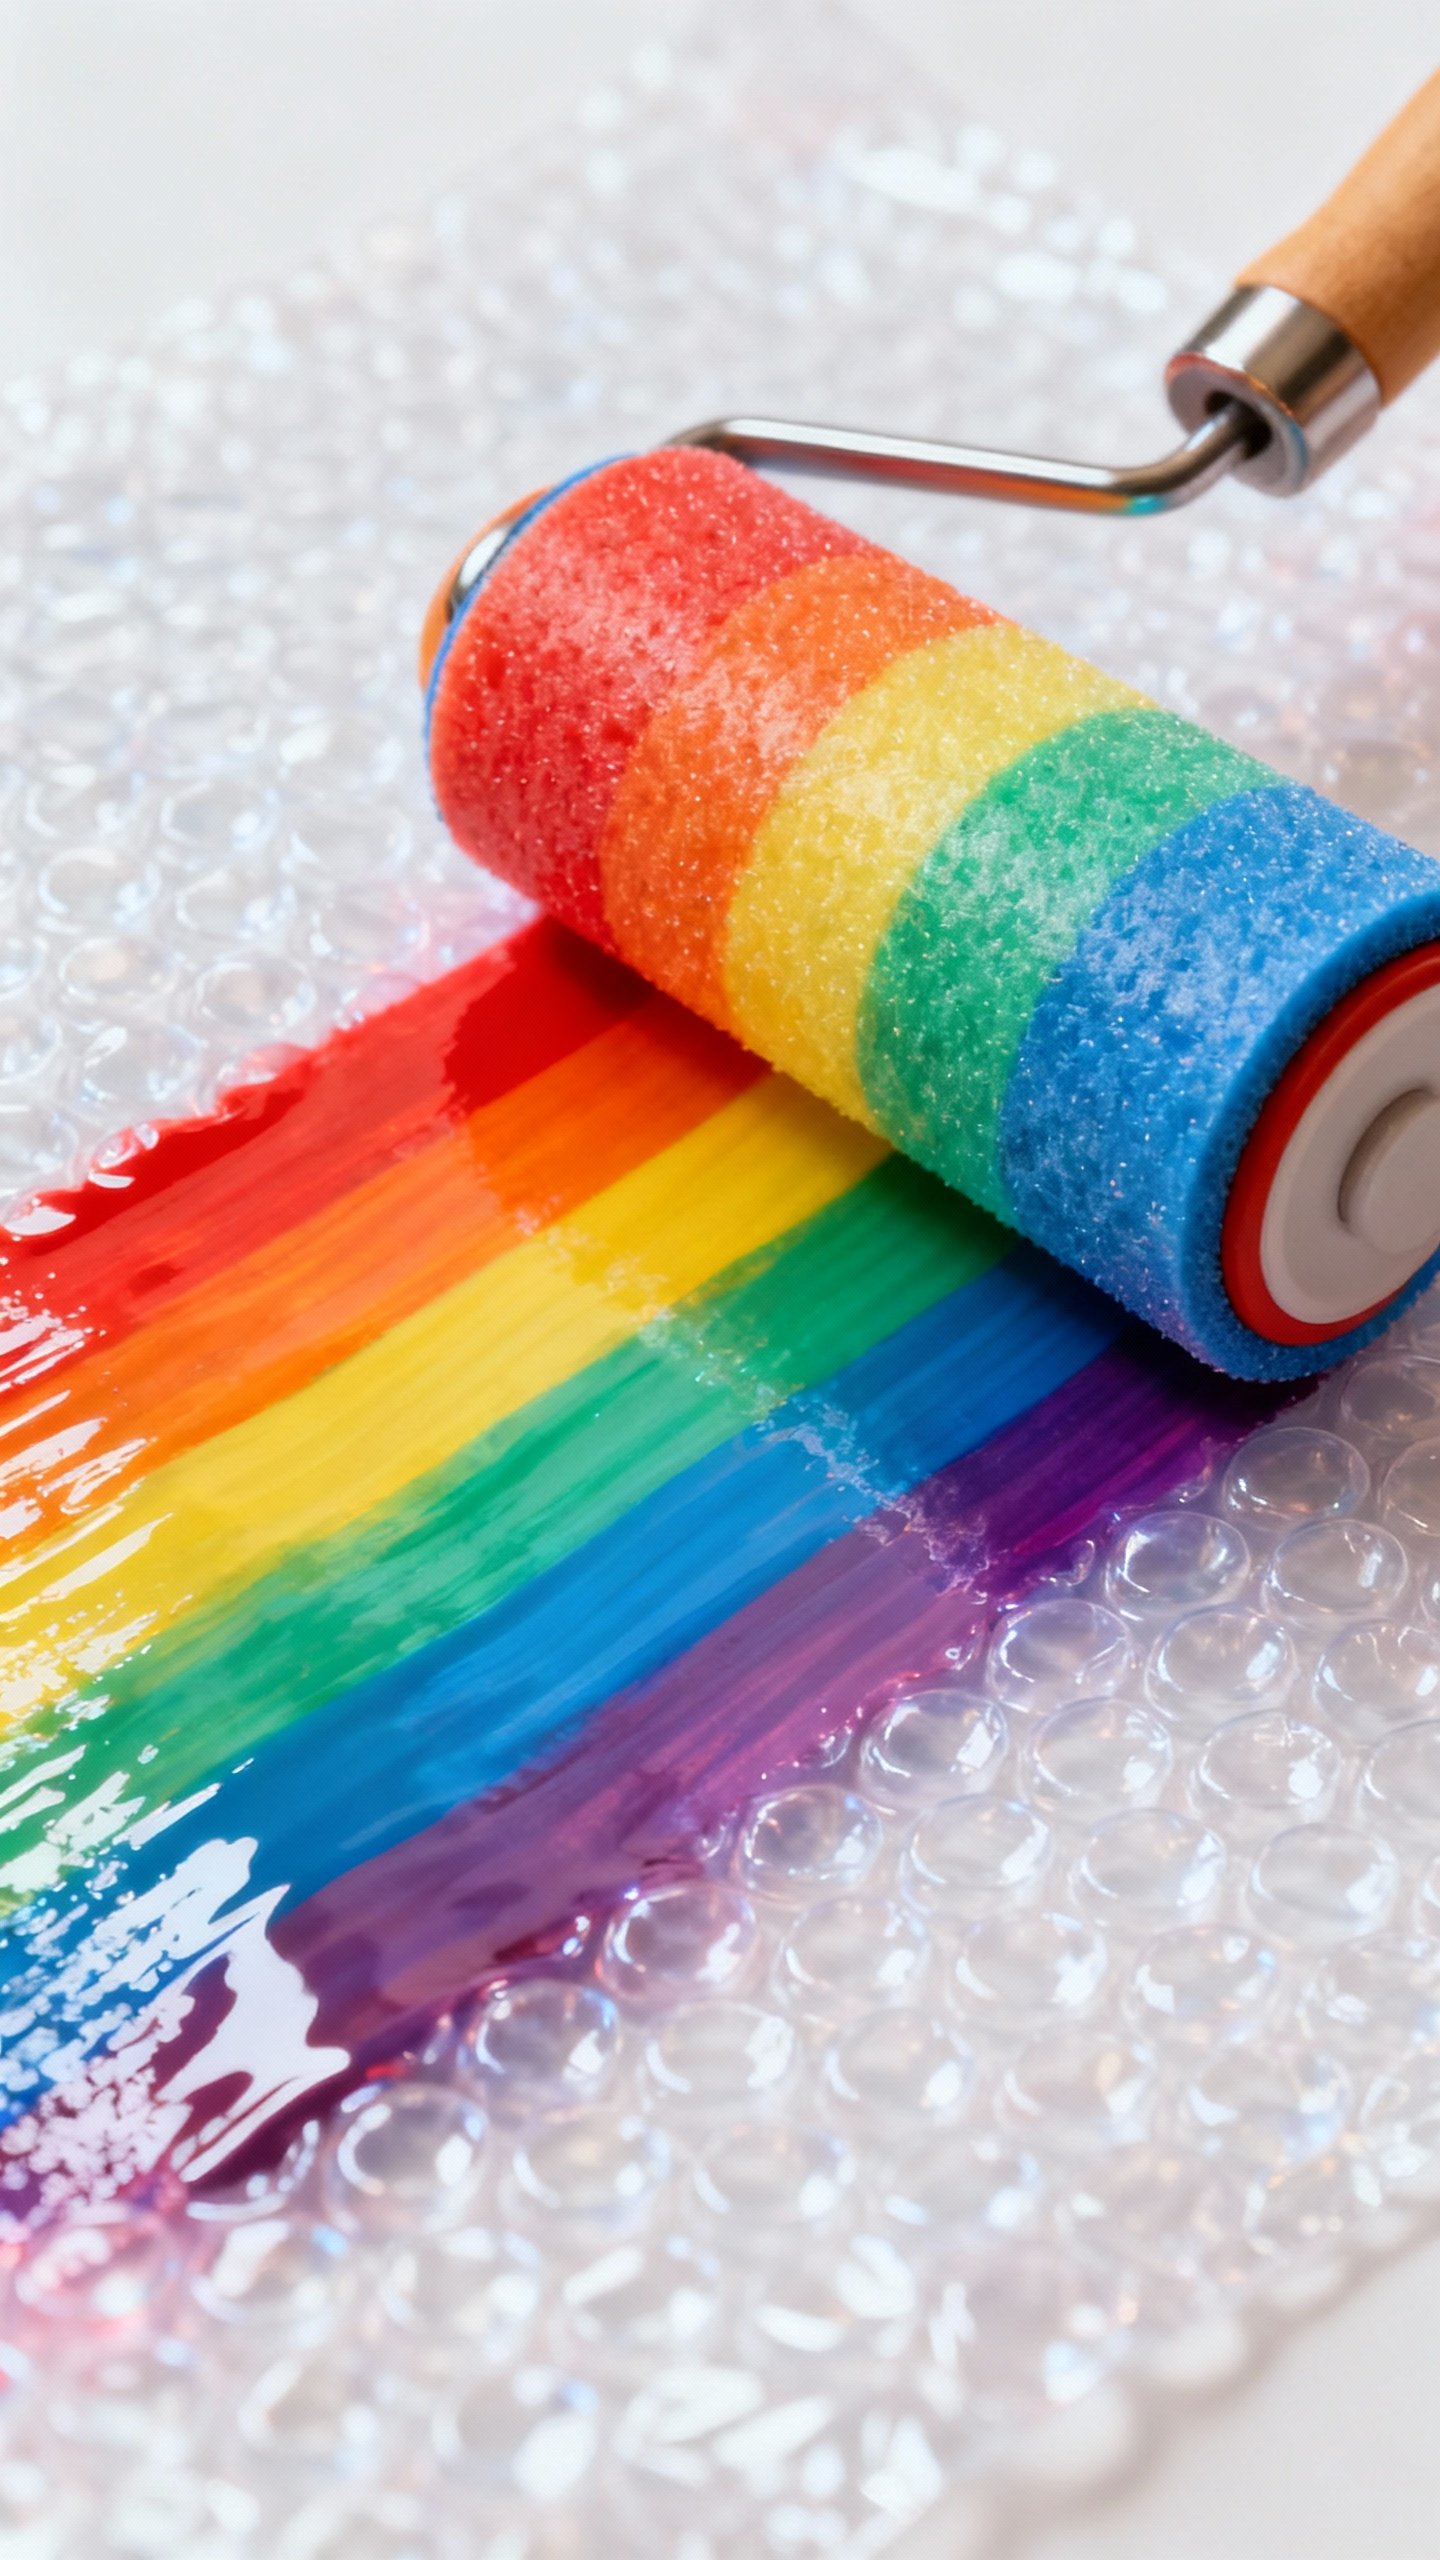
1) Rainbow Roller
- Stripe different colors directly onto the bubble wrap.
- Roll gently to blend edges (not too much!).
- Print once for a gradient effect that looks like magic.
2) Shape Stencils + Dots
- Cut paper into shapes (hearts, stars, dinosaurs if you’re extra).
- Place the shape on top of a bubble print background.
- Or print inside a taped-off shape for clean edges.
3) Nature Mashup
- Collect leaves, flowers, or ferns.
- Print bubble dots first, let it dry, then glue on the nature pieces.
- It gives cool texture-on-texture, like dragon skin meets forest vibes.
4) Collage Cards and Gift Wrap
- Use large sheets for homemade wrapping paper.
- Cut prints into strips and shapes for greeting cards.
- Layer different dot sizes for a designer look. Yes, you’re fancy now.
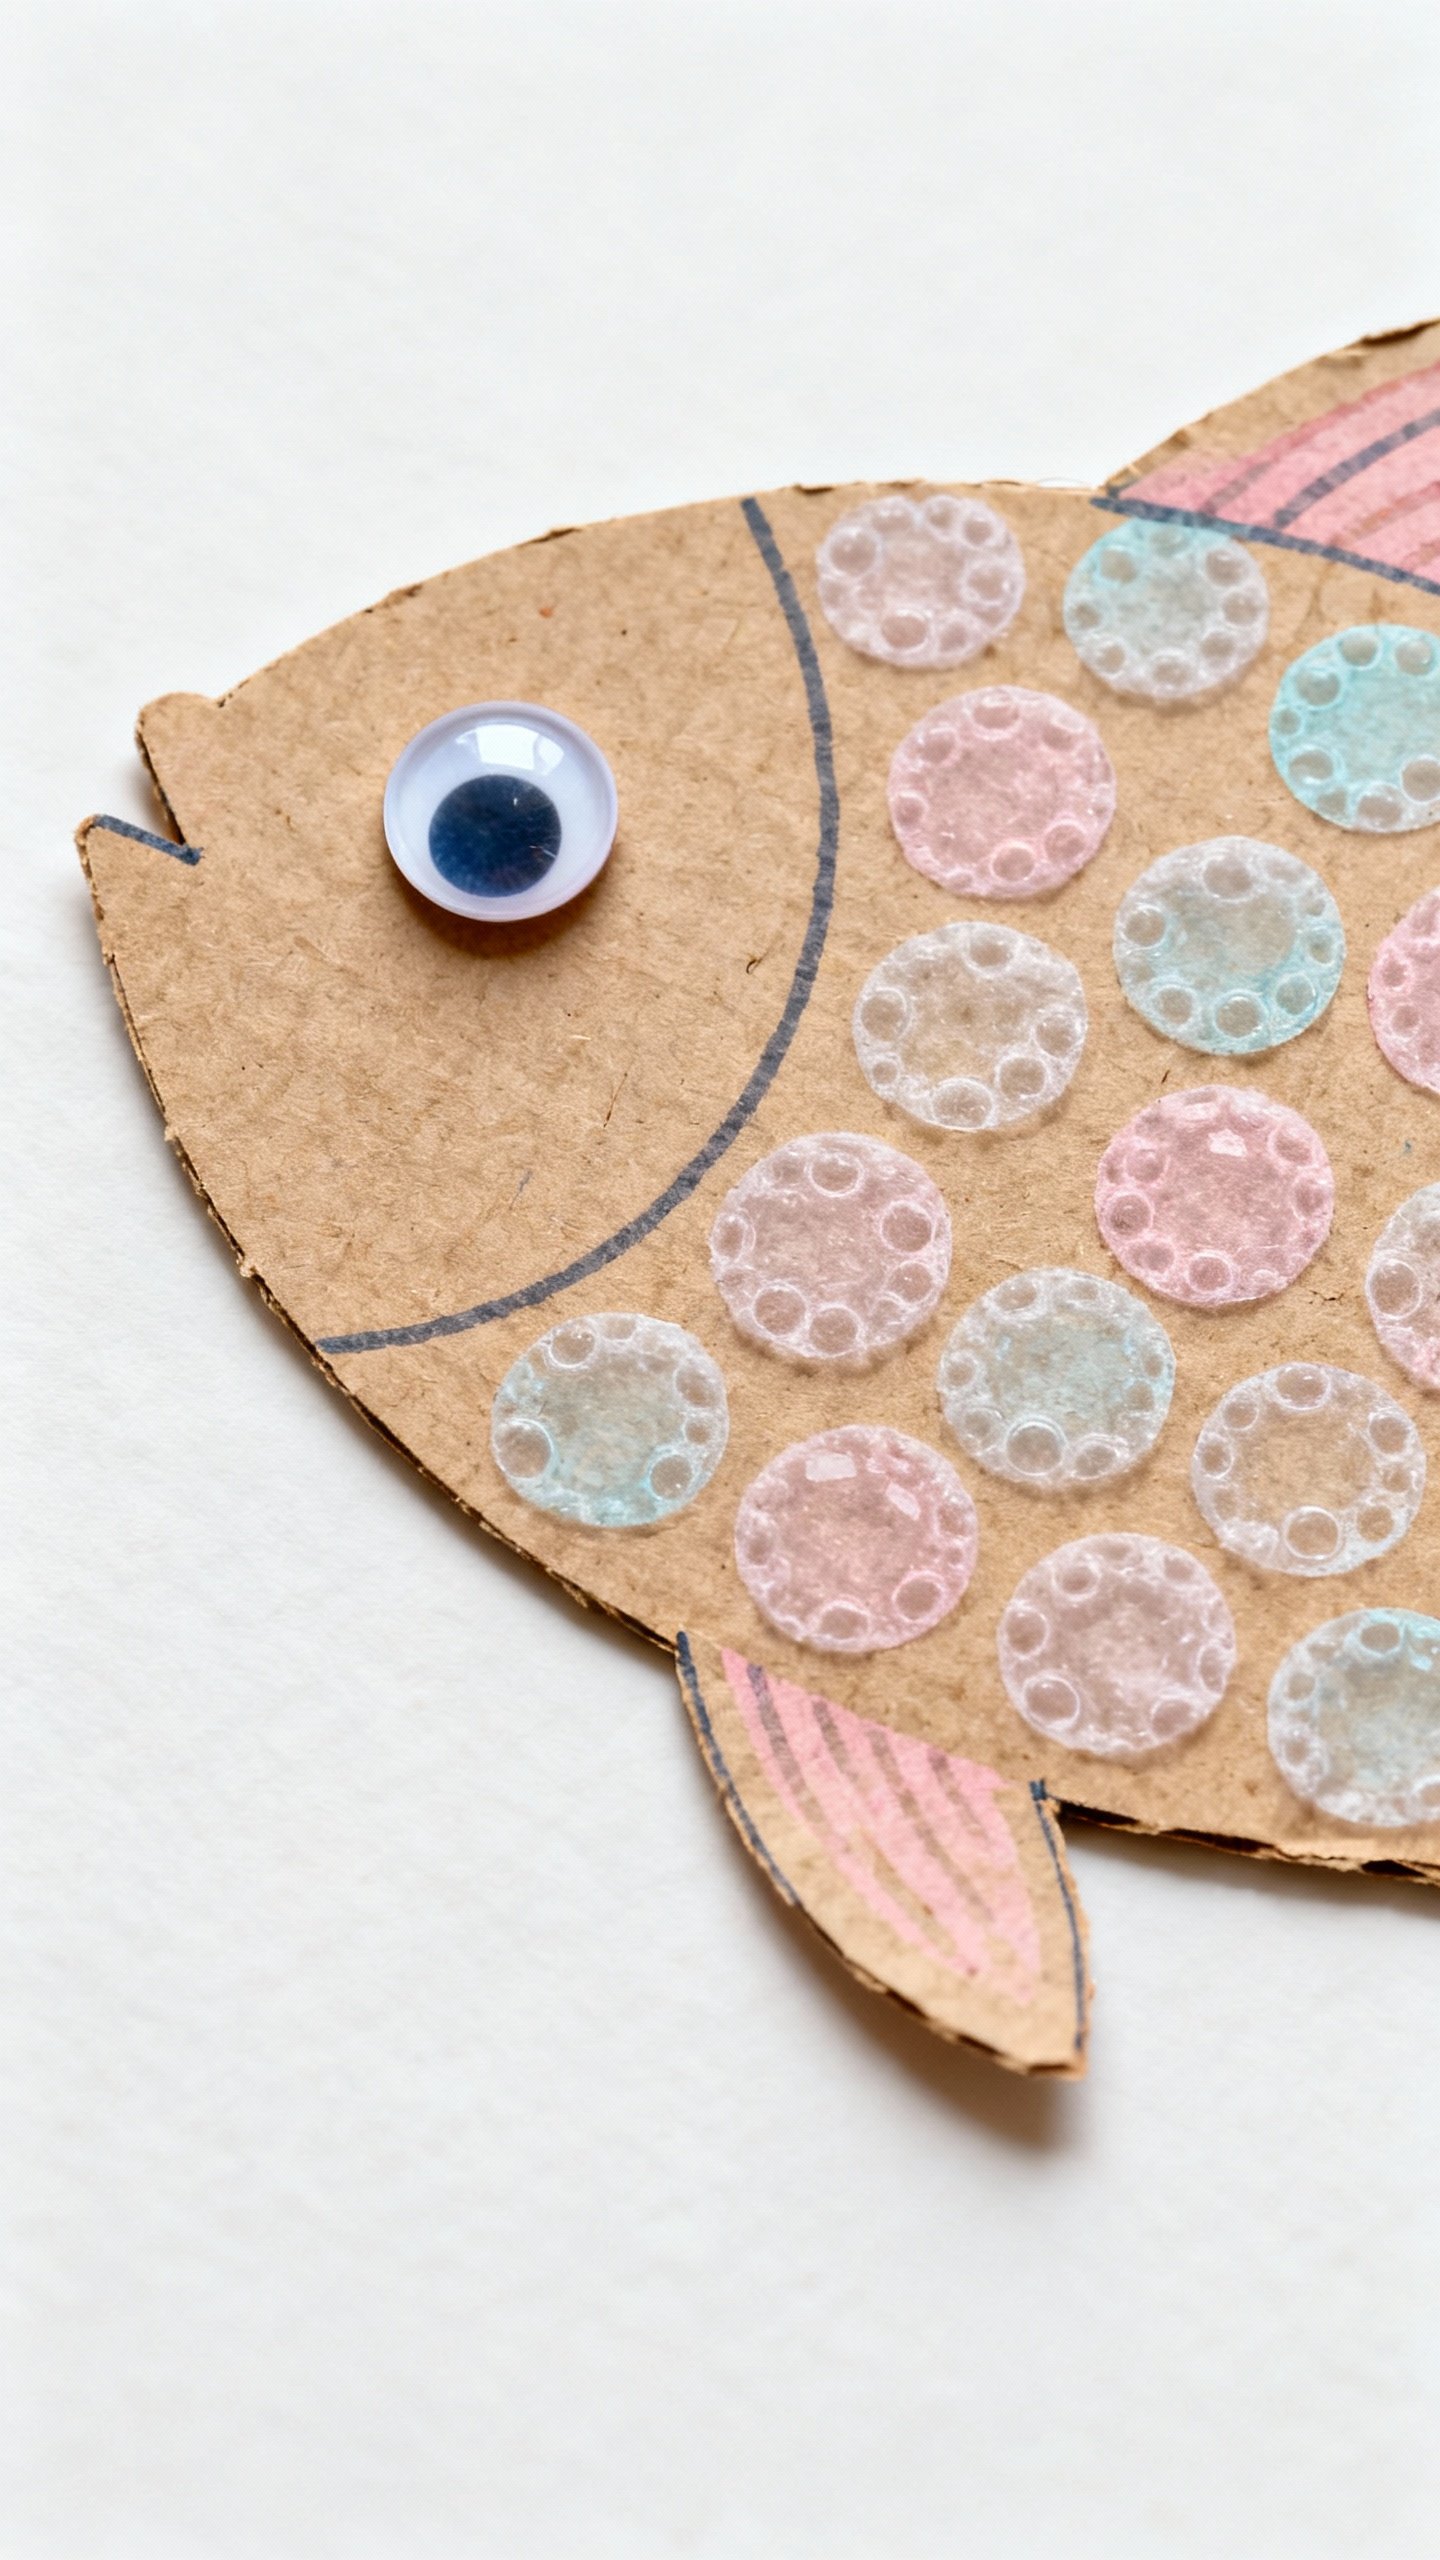
5) Bubble Wrap “Fish Scales”
- Draw a fish outline on paper.
- Print inside the body with bubble wrap for scale texture.
- Add a googly eye because googly eyes make everything better.
Teaching Moments (Sneaky Learning, Zero Lectures)
You can teach a ton without turning it into school.
- Patterns and Repetition: Repeat prints in rows or alternate colors.
- Color Theory: Mix primaries, layer light over dark, and talk about contrast.
- Fine Motor Skills: Rolling, dabbing, and peeling help control and coordination.
- Sensory Play: The gentle pop and texture are satisfying without the mess of slime. IMO, way better.
For Different Ages
- Toddlers: Pre-load bubble wrap with paint and help them press the paper.
- Preschoolers: Let them choose colors and apply paint with foam rollers.
- Big Kids: Try layered prints, stencils, and collage compositions.
Make It Extra: Mess-Free Upgrades
Yes, we can go even cleaner.
You’re welcome.
- Paint-in-a-Bag Trick: Slip a small bubble wrap piece and a dollop of paint into a zip bag. Kids press from outside to “print” onto a paper inside. Zero paint on hands.
- Pre-Taped Print Stations: Tape bubble wrap to individual trays so each kid gets their own setup.
- Disposable Palettes: Use muffin liners or scrap cardboard for paint portions.
Common Oopsies (And How to Fix Them)
- Too much paint? Dab off with a dry sponge, then print.
Thin layers = crisp dots.
- Paper sticks? Lift from one corner slowly. If it tears, you can collage it later. Happy accidents!
- Muddy colors? Stick to 2–3 colors per print.
Clean the wrap between runs.
- No texture showing? Make sure the bubble side faces up. Ask me how I know.
Display and Gift Ideas
Because art deserves glory.
- Frame a series of small prints in a grid—instant gallery wall.
- Cut prints into bookmarks and laminate (clear packing tape works in a pinch).
- Make thank-you cards with bubble wrap backgrounds and hand-lettered notes.
- Create a calendar: one print per month, clipped to a board. Grandparents will cry (in a good way).
FAQ
What kind of paint works best?
Washable tempera or kids’ poster paint works perfectly.
You get bright colors that clean up fast, and they don’t dry too fast on the bubble wrap.
Can I reuse the bubble wrap?
Absolutely. Wipe it with a damp cloth between colors and let it air dry. Reuse until it loses bubbles or gets torn—then recycle it if your local center accepts it.
How do I keep the mess minimal?
Tape everything down, portion paint in small amounts, and give each kid a wipe.
Use aprons and a table cover. The zip-bag method is your mess-free MVP if you need an ultra-clean option.
What paper should I use?
Cardstock or mixed-media paper handles the moisture best and gives crisp prints. Regular printer paper works in a pinch, but it can wrinkle if kids go heavy on paint.
Is this safe for toddlers?
Yes, with supervision.
Use non-toxic, washable paints and larger sheets of bubble wrap to avoid small pieces. Pre-load paint and help with pressing for the best results.
How do I store finished prints?
Let them dry flat, then stack between sheets of wax paper or plain copy paper. You can also press them in a big book for ultra-flat results.
Conclusion
Bubble wrap art hits the sweet spot: fast setup, big payoff, and minimal cleanup.
The dots look awesome, the process feels satisfying, and kids get to experiment without stress. Grab your stash, pick a couple of colors, and print a quick masterpiece—FYI, you might make more than the kids do.
Explore More on FreeKidsHub
Jump into your favorite category for easy printables, fun activities, and family-friendly ideas — all in one place.
Tip: Add this block to the end of every post for stronger internal links ✨