You’ve got windows. You’ve got light. You’ve got a blank canvas begging for some personality.
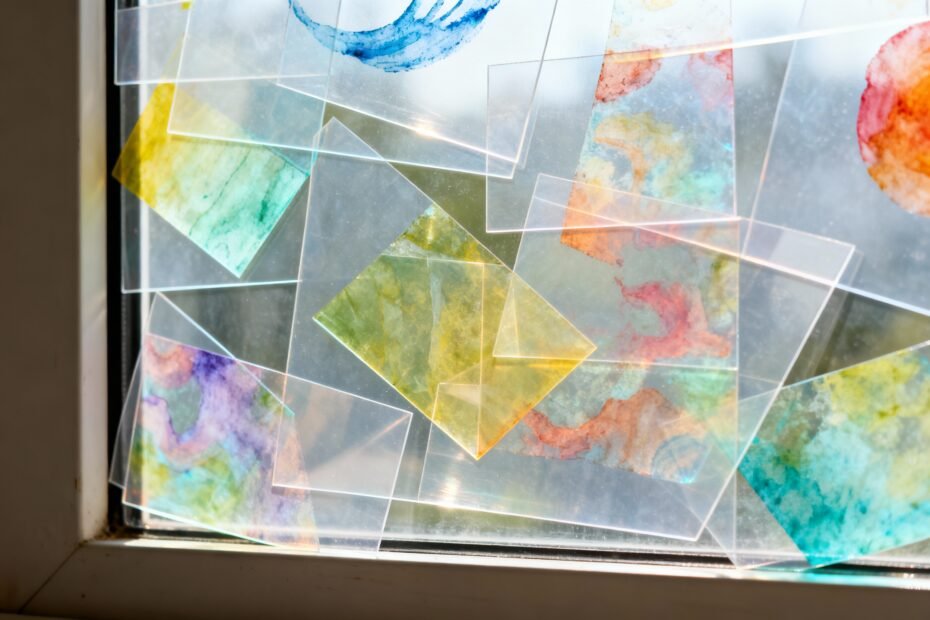
Clear plastic sheets turn any pane into a mini art gallery—no pricey supplies, no commitment, and no “oops, I painted the glass” panic. Ready to turn sunlight into your favorite color filter?
Why Clear Plastic Sheets Make Window Art a Breeze
They’re cheap, easy to cut, and totally removable. You can pop your art in and out with the seasons (or your mood).
Want a stained-glass vibe today and a bold graphic look tomorrow? Go for it. Plus, clear plastic sheets diffuse light beautifully.
You’ll get vibrant color and playful shadows without permanent glass paint. And if you mess up, you recycle the sheet or flip it over—zero stress.
What You’ll Need (Nothing Fancy)
Gather a few supplies and you’re basically unstoppable:
- Clear plastic sheets (acetate, PETG, or polycarbonate sheets; transparency film also works)
- Window-safe mounting (clear double-sided tape, removable mounting squares, or suction cups with clips)
- Color (alcohol inks, acrylic paint pens, Sharpies, Posca pens, or water-based glass markers)
- Outline tools (black paint pen, permanent marker, or 3D liner for faux leading)
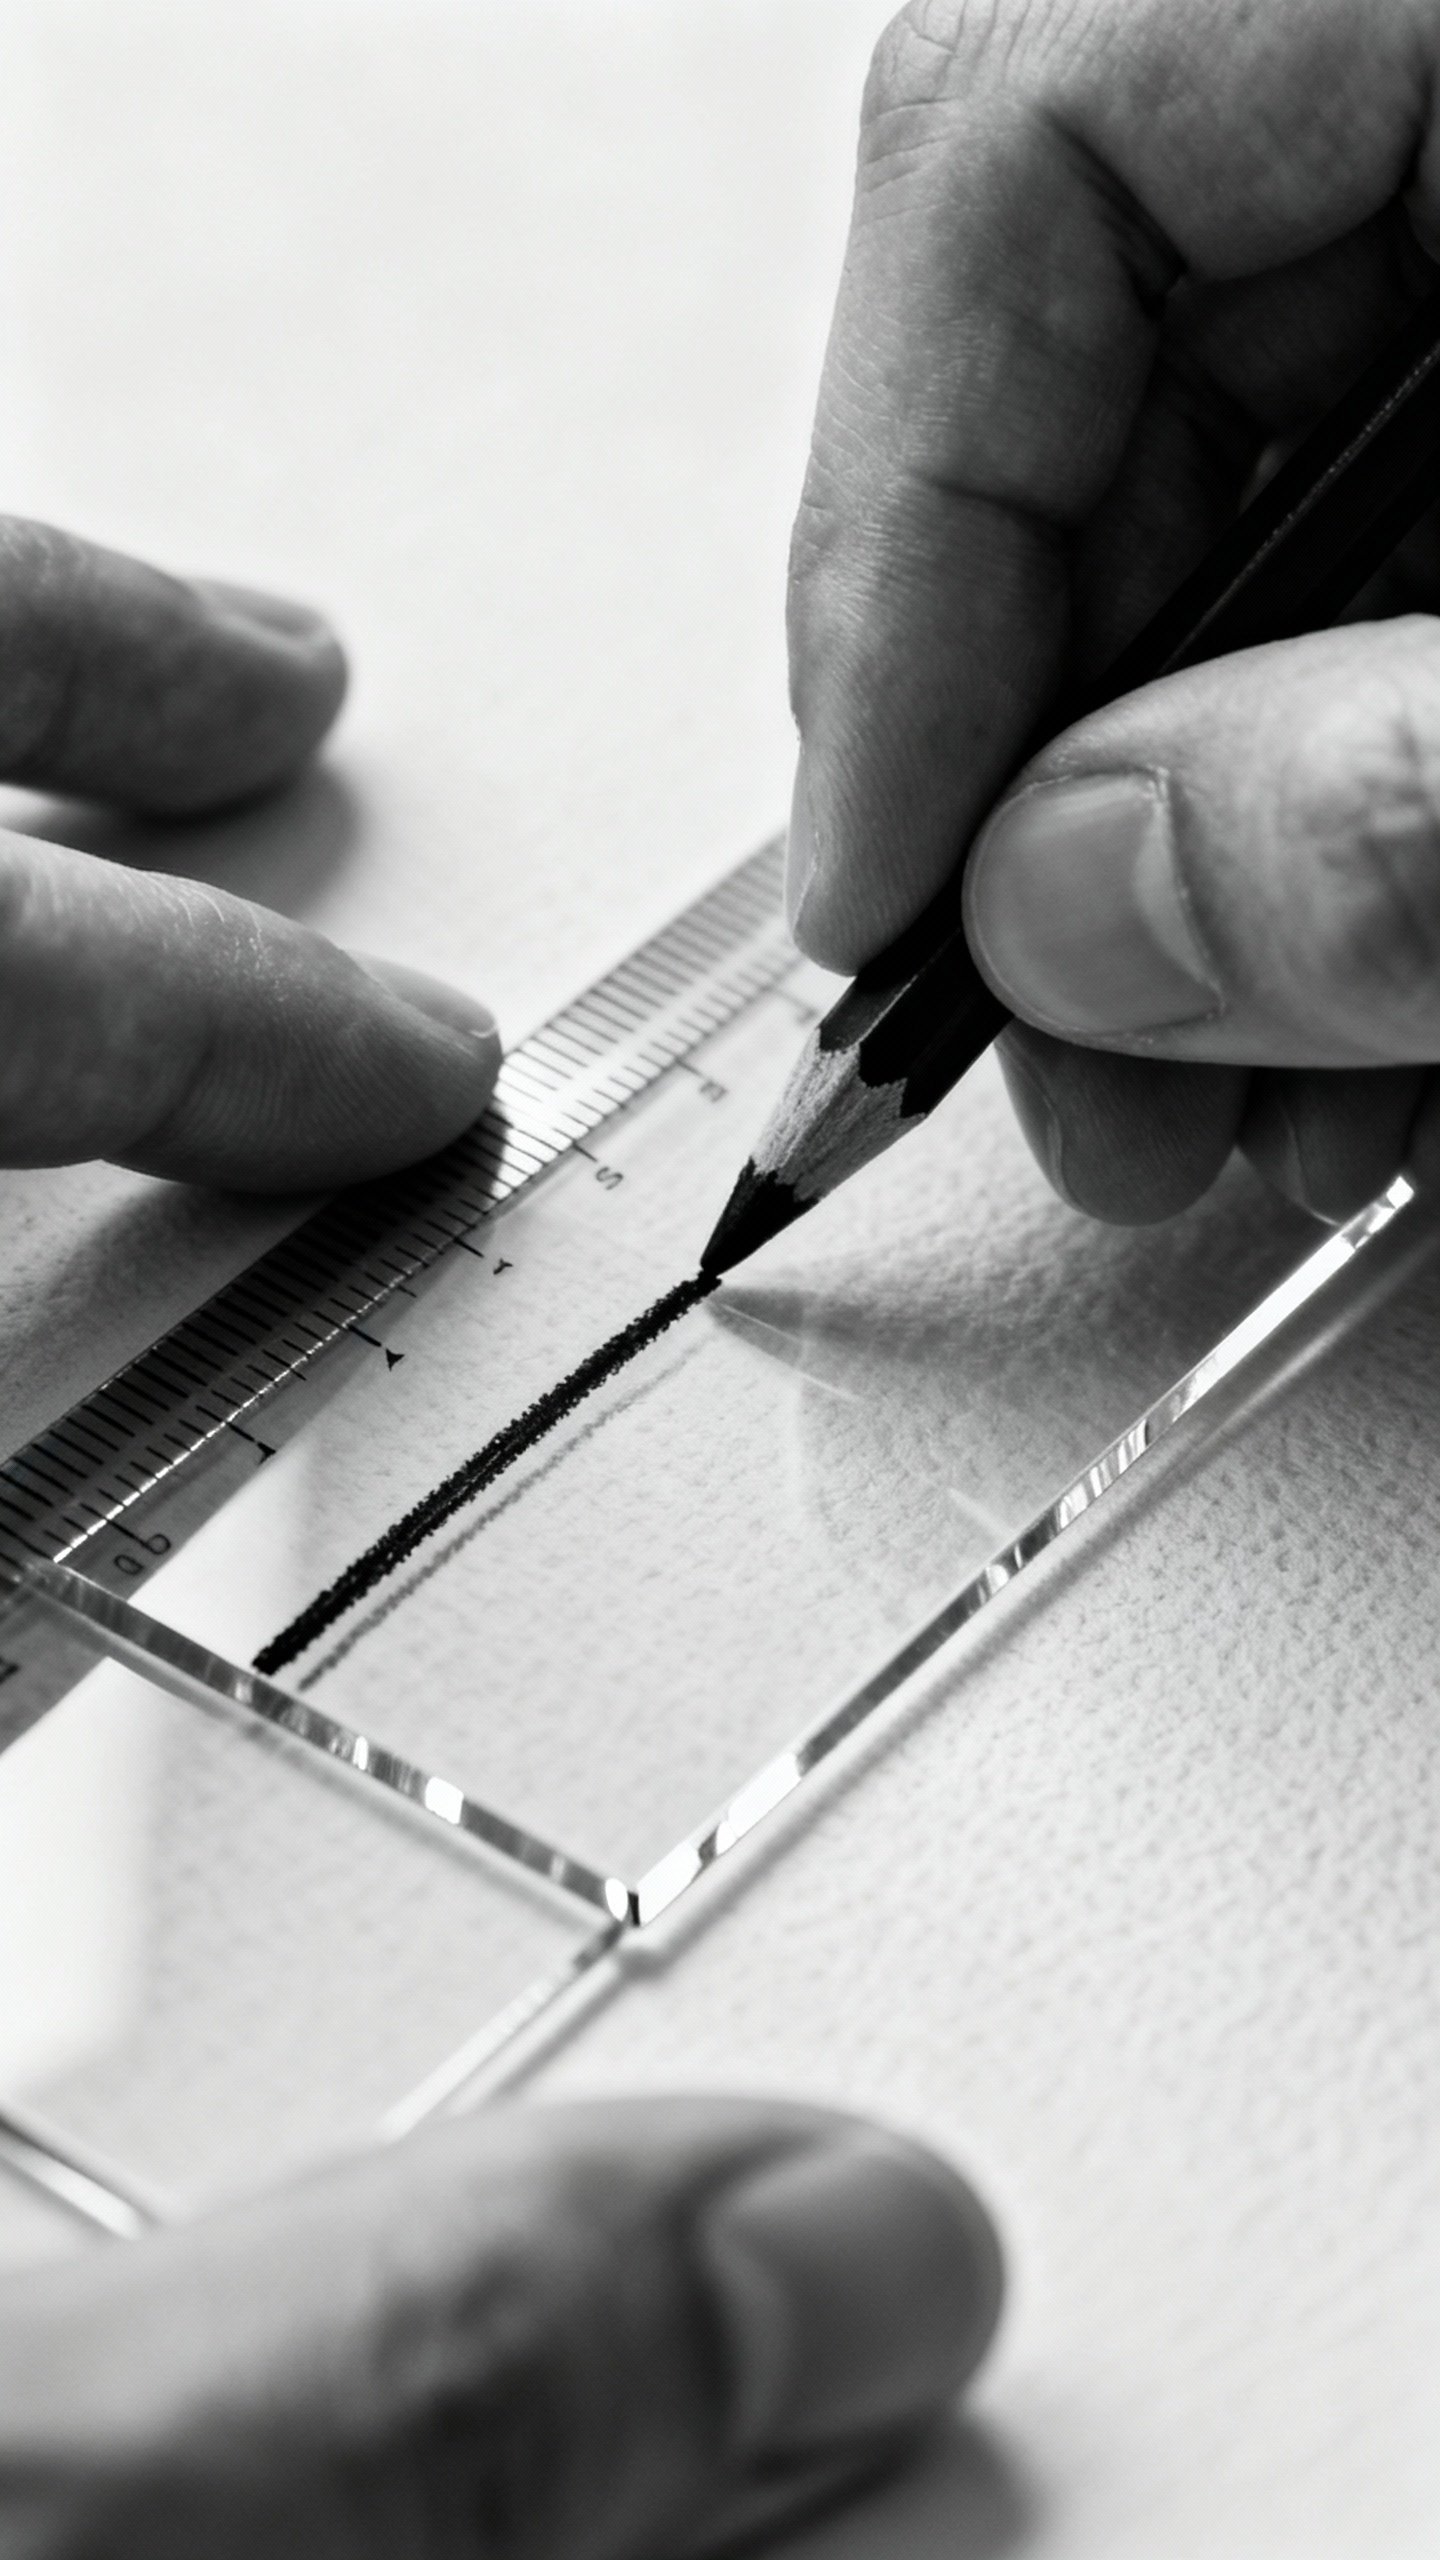
- Cutting tools (scissors, craft knife, metal ruler)
- Templates (printouts, stencils, your kid’s doodles—you name it)
- Cleaning supplies (microfiber cloth, isopropyl alcohol)
Picking the Right Plastic
- Acetate/transparency film: Thin, cheap, great for layering or small panels.
- PETG: Flexible but tough; awesome for larger pieces.
- Polycarbonate: Very sturdy, slightly pricier; ideal if you want something long-lasting.

Simple Techniques That Look Seriously Fancy
You don’t need art school for this. Try one or mix a few—IMO, that’s where the magic happens.
Stained-Glass Illusion
- Print a simple pattern (florals, geometric shapes) and place it under the sheet.
- Trace the lines with a black paint pen or 3D liner to mimic lead.
- Fill in areas with alcohol ink or transparent markers for that juicy color.
FYI: Alcohol ink stains like a vengeful blueberry.
Cover your surface.
Bold Graphic Panels
- Use opaque paint pens for crisp shapes and block colors.
- Layer colors after each dries for clean edges and a screen-print vibe.
- Leave some clear areas to let light breathe through the design.
Pressed Flower Look (No Flowers Required)
- Draw delicate leaves and petals with fine-tip markers.
- Add thin color washes with diluted acrylic or watercolor markers.
- Outline only some shapes to keep it airy and organic.
Sun Catchers with Alcohol Ink
- Drop ink directly onto the sheet, tilt to blend, and let it do its cosmic thing.
- Use a straw for subtle swirls or a felt pad for soft gradients.
- Outline shapes afterward if you want structure.
Step-by-Step: From Blank Sheet to Window Wow
- Prep the sheet. Wipe with alcohol and a lint-free cloth. Clean surfaces make paint behave.
- Choose and tape down your template. If you’re freehanding, skip this and embrace chaos.
- Outline first. Draw major lines with a black paint pen or marker. Let it dry fully.
- Add color. Start light, build up.
Transparent inks for glow, opaque pens for punch.
- Layer details. Add highlights, patterns, or speckles. Keep it playful.
- Seal if needed. Most markers don’t require sealing. If you used alcohol ink, a light spray of clear acrylic varnish on the back helps durability.
- Mount it. Use clear tape dots on corners, removable strips, or a hanging frame with suction cups.
Framing Options That Don’t Look DIY (Even Though They Are)
- Poster frame without the backing: Sandwich the plastic and hang with suction cups.
- Washi tape border: Clean edges, quick swap-outs, surprisingly cute.
- Wood dowel hangers: Clip the top and bottom with binder clips on a dowel for a scroll effect.
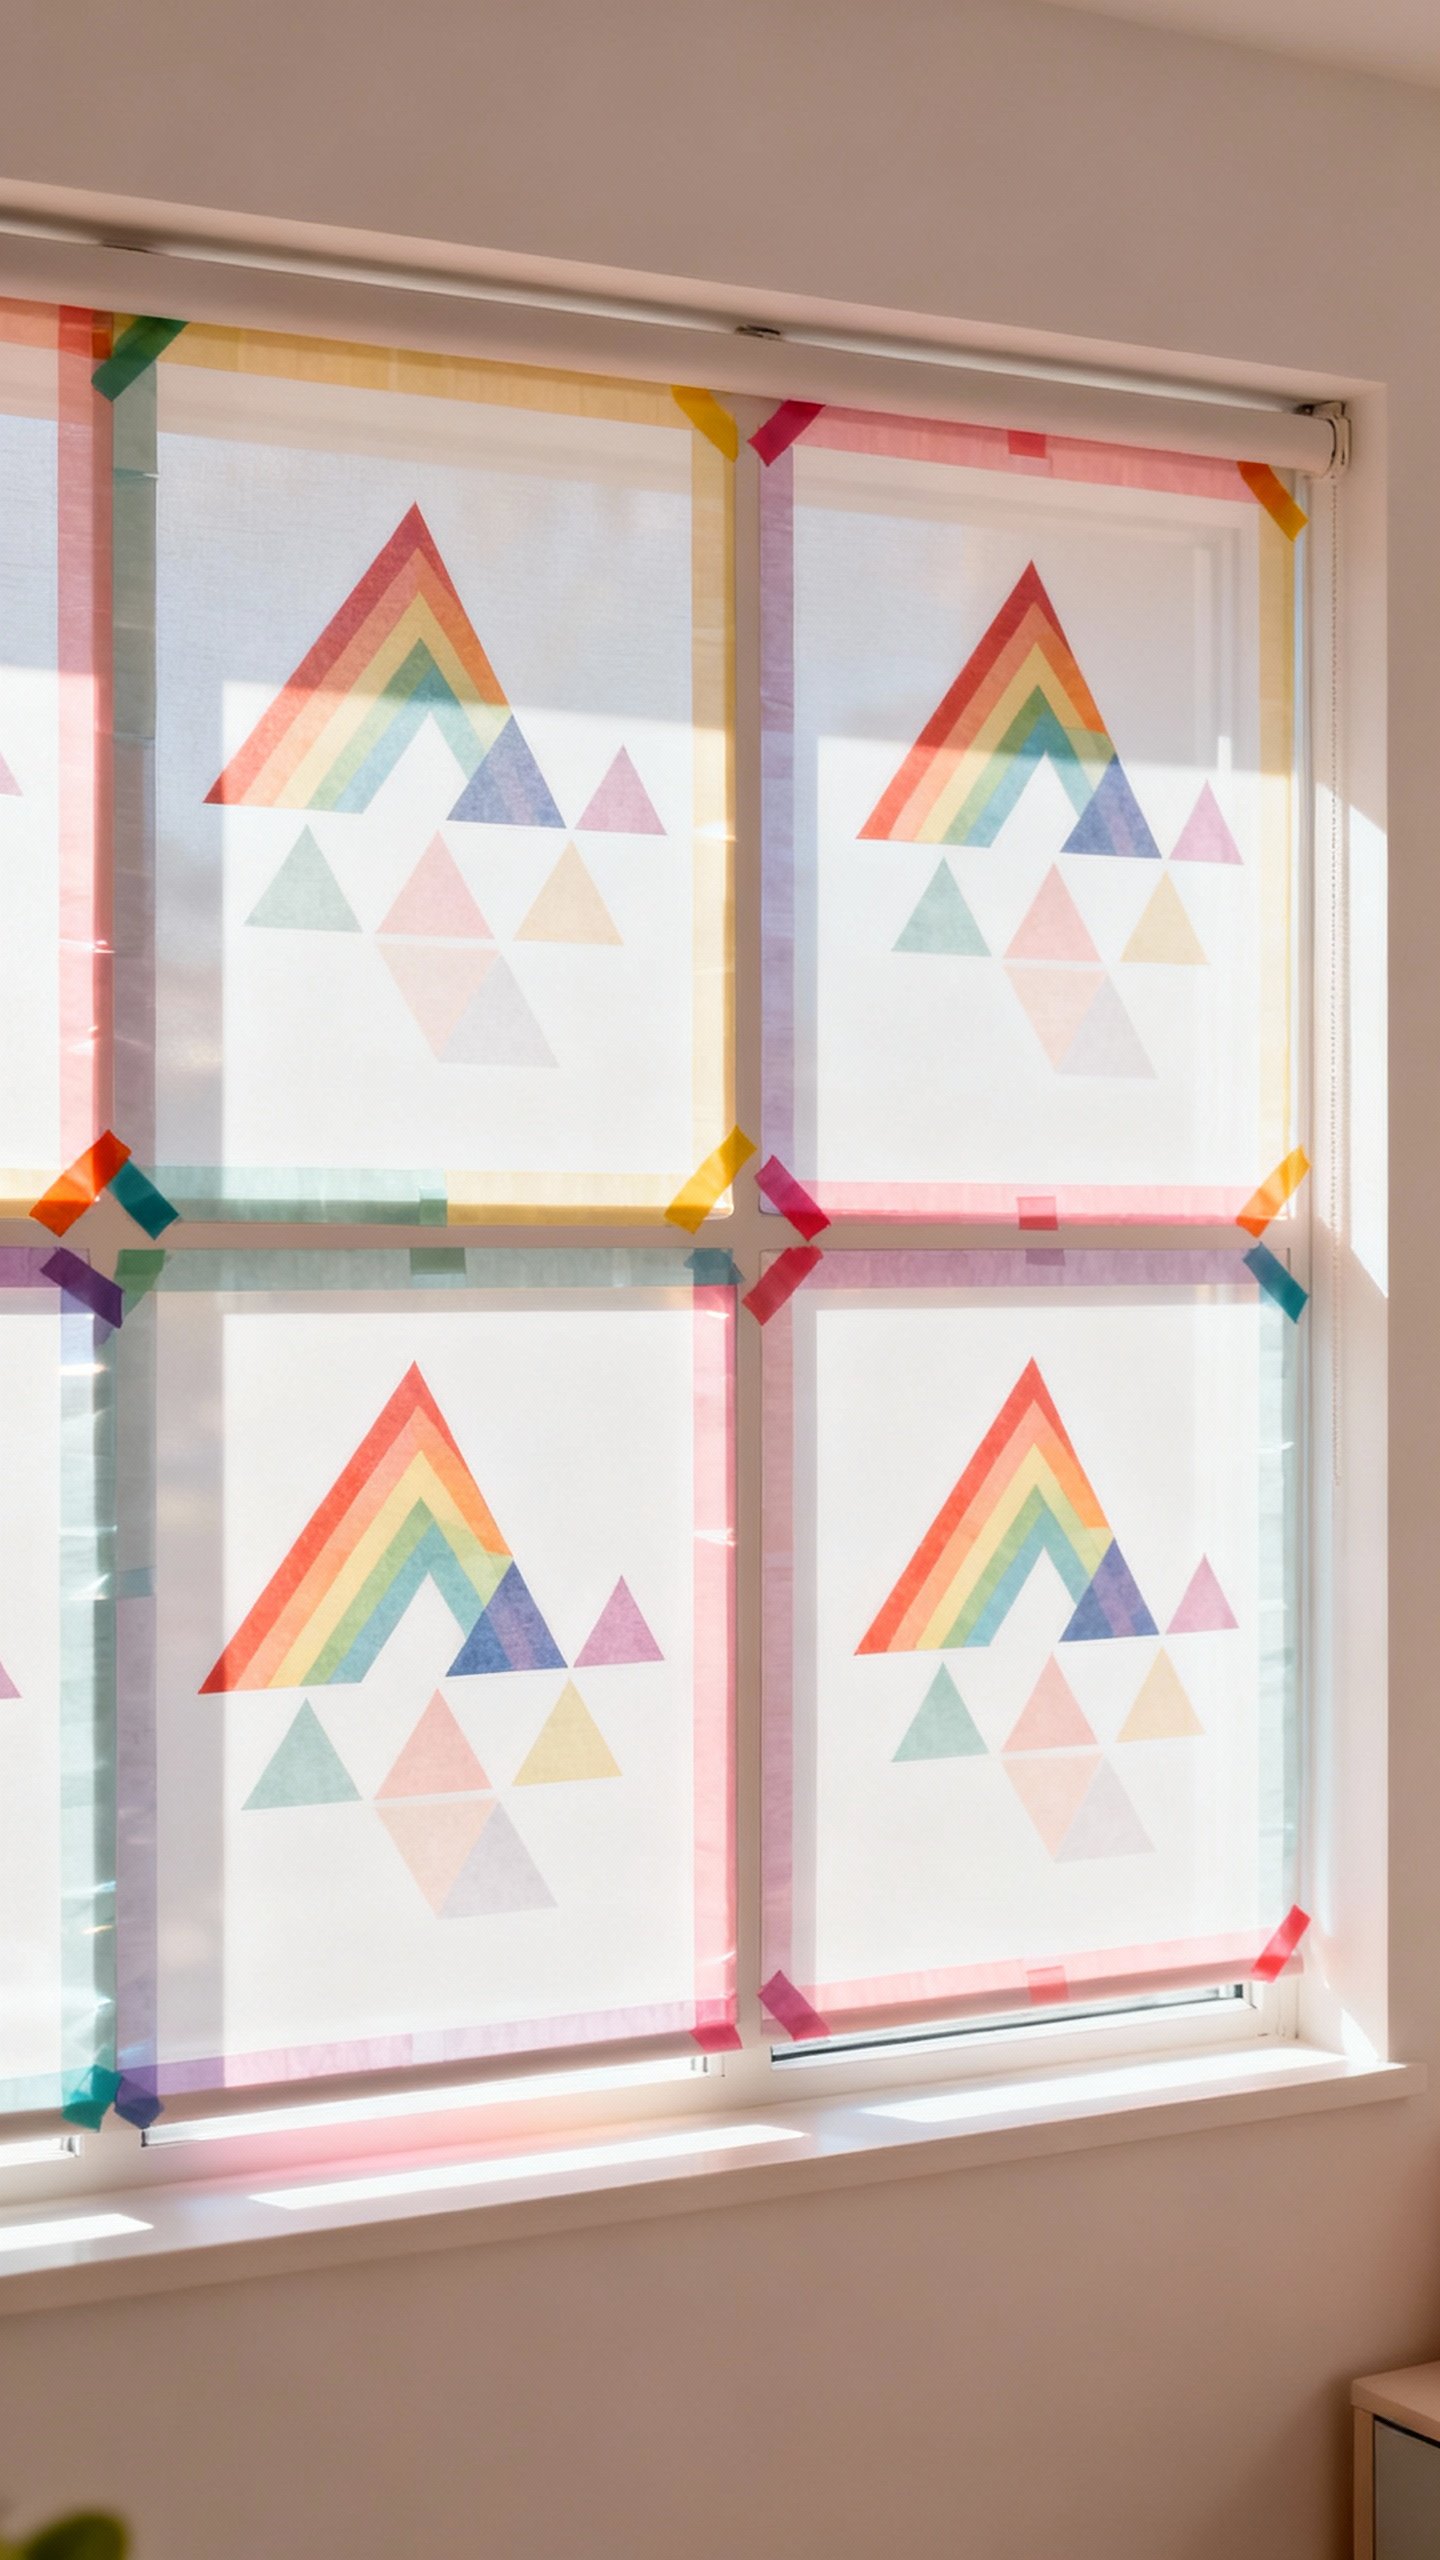
Design Ideas You’ll Actually Want on Your Windows
- Geometric rainbow: Triangles or arcs in gradient colors.
Instant vibe.
- Botanical line art: Monstera leaves, ferns, and tiny mushrooms. Cottagecore achieved.
- Constellation map: Dots and lines on a deep blue ink wash. Night-sky energy by day.
- Minimal quote: One bold word in white over translucent color blocks.
Motivation, but make it pretty.
- Seasonal swap: Snowflakes, spring blooms, summer waves, autumn leaves. Rotate like a pro.
Kid-Friendly Projects
- Let kids color pre-drawn shapes with washable markers.
- Use sticker sheets on top of acetate for zero-mess collages.
- Make “viewfinders” with cut-out frames to stick at kid height. Cute and durable.
Tips, Tricks, and Small Gotchas
- Test your markers on a scrap first.
Some look transparent on plastic; others turn streaky.
- Avoid heavy paint layers that might peel. Thin coats win.
- Don’t touch lines while drying. Even “quick-dry” pens need a minute. Ask me how I know.
- Mind the sun. Intense UV can fade colors over months.
Rotate pieces or use UV-resistant inks if you care.
- Clean the glass before mounting. Dust ruins adhesion and your sanity.
- Label the back with painter’s tape if you plan to store it—date, side, orientation.
Storage and Reuse
- Slide panels into plastic sleeves with a sheet of paper between layers.
- Store flat to prevent warping, or roll loosely around a tube.
- Refresh edges with new tape dots each time you re-mount.
Going Bigger: Modular Panels and Layering
Want a statement wall? Build it in pieces.
Create several smaller sheets that form a larger image. Mount them side by side with a tiny gap to let the window grid show through—very gallery, very “I definitely planned this.”
Layering for Depth
- Hang two sheets slightly offset. Put bold outlines on the front layer and soft color washes on the back.
- Use different opacities so the sun reveals details at different times of day.
- Try a shadow play: cut shapes from tinted film and layer over drawn lines for dimensional color.
FAQ
Can I make window art if I rent and can’t damage walls or glass?
Yes.
Use removable mounting strips, clear tape dots, or suction-cup frames. They come off cleanly and won’t leave residue on glass.
What markers won’t fade in sunlight?
Alcohol-based markers and inks look vibrant but can fade over time. For better longevity, choose paint pens labeled UV-resistant or add a clear UV-protective spray on the back.
Rotating pieces also helps, IMO.
How do I avoid streaks on plastic?
Work in thin layers, let each coat dry, and use quality pens. If streaks happen, add a second light pass in the same direction. For large areas, alcohol inks or lightly dabbed sponge techniques hide strokes beautifully.
Will this warp with heat or sun?
Thin sheets might bow slightly in hot windows.
Use thicker PETG or polycarbonate for sun-drenched spots, or frame the piece to keep it flat. Small panels rarely warp enough to notice.
Can I clean the art once it’s mounted?
Clean around it with a soft cloth. If you must clean the art itself, use a dry microfiber cloth and avoid solvents.
Harsh cleaners can smudge inks or cloud the plastic.
What if I mess up a section?
Wipe off fresh mistakes with isopropyl alcohol (test first). If it’s dry and stubborn, layer over it, add a pattern to disguise it, or cut that section into a smaller suncatcher. Creative “fixes” often look intentional—IMO, that’s half the fun.
Conclusion
Clear plastic sheets keep window art fun, low-commitment, and wildly customizable.
You can chase sunlight, swap designs with the seasons, and experiment without fear. Grab a sheet, a few pens, and a window—and let your inner color gremlin run wild. Your home will thank you every sunny day.
Explore More on FreeKidsHub
Jump into your favorite category for easy printables, fun activities, and family-friendly ideas — all in one place.
Tip: Add this block to the end of every post for stronger internal links ✨